This blog is my collection of healthy recipes and other health and nutrition related information from all over the web. This is just my way of sharing all the healing goodness with my family and friends.

Tuesday, July 28, 2015

Spinach Khichdi

Khichdi is my go-to comfort food. It is my kind of fast food - healthy, easy and quick to make. For the longest time I used to make Khichdi in the simplest way possible - Mix rice & green mung dal, add salt and pressure cook it. The only fancy thing that I did to my khichdi was top it off with a spicy salad of diced onion and tomatoes.
Off late I have been trying to make khichdi with some variations and the results have been pretty good. The main theme is still a simple mix of dal and rice but the small tweaks have brought a fresh flavour to a good old favorite. In this recipe, adding spinach increases the nutrient value of the khichdi and its still a simple one-pot meal. I make this often especially when I have some extra spinach on hand that needs to be finished. There are a couple of different ways to incorporate spinach into the khichdi, I have put the options in the Notes below:

INGREDIENTS:
1/2 cup yellow mung dal
1/2 cup masoor dhuli dal
1/2 cup rice
3 cups spinach - finely chopped (can add more)
3 cups water
salt
1/2 tsp turmeric powder
Tadka/Tempring
1 tbsp ghee
1tsp cumin seeds
1 tsp garlic -minced
1-2 whole red chillies
2-3 tejpatta
1 pinch heeng/asafetida
1/4 tsp garam masala (optional)

NOTES:
-Spinach: I simply chop the spinach and add it to the pressure cooker along the dal and rice - this is the simplest way to approach this one pot meal. You could chop and blanch the spinach separately and add it to the khichdi mix once its cooked - you will need to cook it a bit more after addign the spinach. Another alternative is to simply blend the raw spinach into a smooth paste and add it to the cooked khichdi - again you would want to cook the mixture for a few minutes once you add the spinach. In all the above options, tadka is the last step in the recipe.
-If you want your khichdi to be more fancy, you could also add another layer of tadka to the cooked khichdi - starting with minced ginger-garlic in a 1tbsp of ghee. Followed by chopped onion and chopped tomatoes.

PROCESS:

  1. Cook the the washed lentils, rice and spinach mixed with 3 cups of water in a pressure cook. It usually takes 2 whistles on medium flame. Add more water if you feel the khichdi looks too dry.
  2. Het ghee in a pan and add the cumin seeds, followed by minced garlic. Then add the tejpatta and red chillies. Add the hing.
  3. Add this tadka to the khichdi and mix it well and let the khichdi simmer for a couple of minutes. Add the garam masala if using. At this point, adjust the seasoning and add water to make the consistency as per your liking.
  4. Khichdi is ready to be served.


Monday, July 27, 2015

Weekend Links


Spoiled Rotten: Being too friendly with your kids might backfire - a great article on today's parenting style.
Object of Desire: A brilliant article on the issue of female consent and how our films are propagating a very skewed version of it.
Before I say Goodnight: A beautiful piece on the fragility and beauty of out lives.

Monday, July 20, 2015

Weekend Links


It has been a while since I did a post on what I have been reading. Here are few things that I found really great:

TED Talk: The Happy Secret to Better Work. Funny and insightful. Pay attention to the last 30 secs.
Swallow This: The dark secrets of the food industry - scary but eye opening. A long article but I really urge that you take the time out to read it.
How to make stress your friend: It shows a new and very insightful perspective on stress and how to handle it.


Monday, July 13, 2015

Grilled Corn & Pepper Salad

 This is a perfect summer salad that you can have for lunch or as dinner on a warm evening. I made it for lunch last week and and was planning to skip the grilling part of it as I don't own a grill but I am glad I did not. I used my oven to grill the vegetables - which was essentially roasting them but I still liked the corn and peppers better this way compared to adding them raw (at least in this recipe). The salad is topped with a delicious sweet and savory chili lime dressing that brings out the flavors of all the vegetables:

INGREDIENTS:
1 tbsp Olive Oil
2-3 handfuls of Arugula
1 large red pepper - deseeded and cut into 1 inch pieces
1 small onion - sliced length wise
1-2 corn cobs -
1 cup of black beans (Rajma) - soaked overnight & boiled
1 avocado - chopped
1/2 cup fresh cilantro - chopped
Fresh goat cheese
Corn chips - garnish
Dressing:
1/4 cup olive oil
1/4 cup fresh lime juice (might need more)
1/2 tsp chilli flakes
1-2 tsp honey or agave nectar
1/2 tsp salt

NOTES:
- This time I had not soaked the black beans well in time so could not add them - but I added some cooked black rice which I had in the fridge - they brought some extra texture to the dish.
- Maybe next time - I will try adding the corn without grilling them

PROCESS:
  1. Preheat the oven to 400F and put it on broil.
  2. Put some olive oil on the chopped peppers, sliced onions and the whole corn cobs ( I just use my hand to mix in the oil) - sprinkle some salt and pepper. Place the veggies on a cookie sheet and place them in the oven. Roast/grill the veggies till they are bit charred - takes anywhere between 15-20 mis.
  3. Dressing: Whisk in all the ingredients in a small bowl. I had to add in more lime juice later once I mixed the dressing in the salad. So you might have to adjust the lime juice, chili flakes, salt etc to your preference.
  4. Once the veggies are done - slice the corn put it in a big bowl along with the onion, peppers and the arugula. Add in the chopped avocado, beans. 
  5. Drizzle the dressing
  6. Garnish with cilantro, goat cheese and corn chips - crushed into pieces. 


Thursday, July 9, 2015

Cherry Crostini

The cherry season is almost over here in the bay area but we are far from done with them. I found some very good ones from Oregon selling at my local store and I got home a big bag. I am mostly not in favor of cooking with fruits primarily because it feels like you are killing their awesome natural texture and juices.
But a few days back, when I caught a glimpse of this crostini on the pages of a magazine (Bon appetit to be exact), I was literally drooling - so much so that I made it that same evening. It's a pretty simple dish which would work as an awesome appetizer, we however had it for dinner.
INGREDIENTS:
1-2 tbsp olive oil
2 cups cherries - pitted and halved
baguette slices
fresh goat cheese
Coarse salt
fresh black pepper

NOTES:
- Buy the best quality goat cheese you can find and account for its salt content. Mine had no salt added.
- I did pit the cherries first, using the flat end of a chopstick. (It's not as hard or time consuming as it sounds).However, I later on realized that I could have simply cut the cherries in half and then thrown the pit. Try both options and see which one works best for you.

PROCESS:
  1. Heat oil in a cast iron skillet or a heavy bottom pan - keep the flame high
  2. Add cherries and cook them for about 5 minutes- stir frequently. The cherries should turn soft but not falling apart.
  3. Sprinkle the salt and pepper
  4. Smear goat cheese on baguette slices - top with a spoonful of cherries.


Tuesday, July 7, 2015

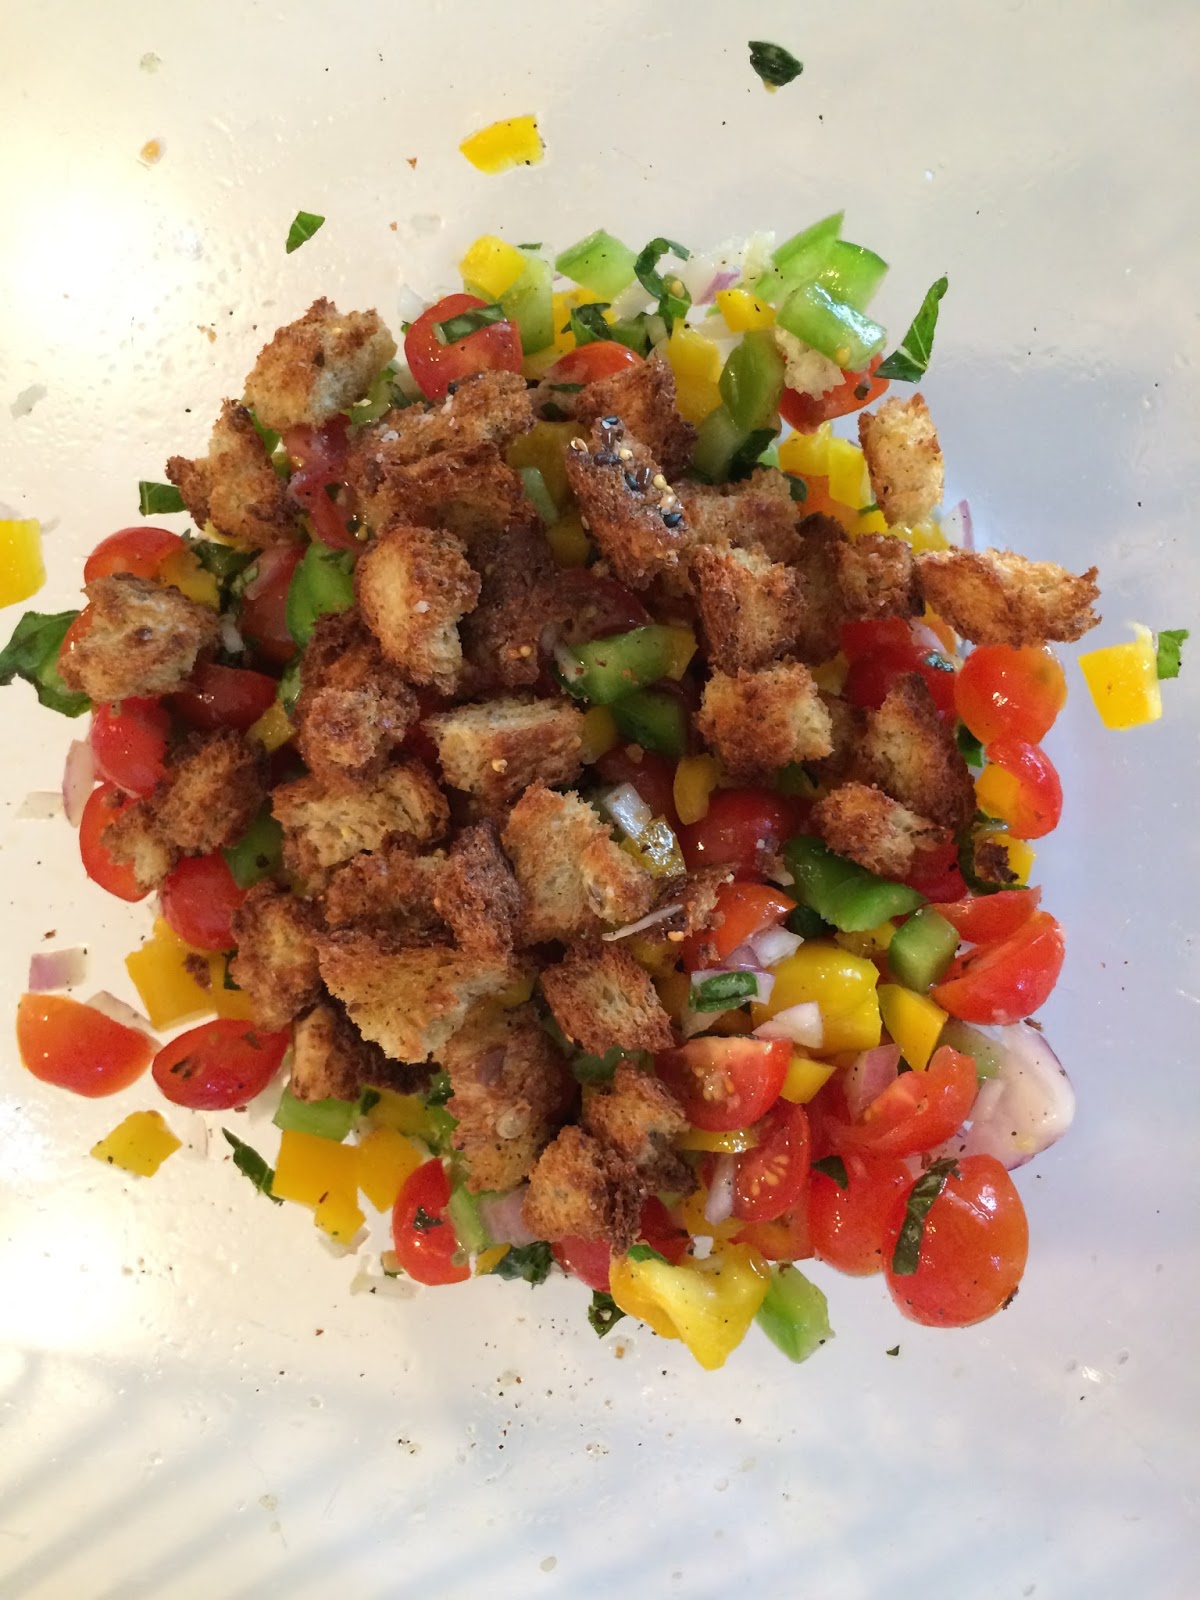
Tomato Panzanella Salad

This is one of my all time favorite salads - I am surprised that I have not posted it till now. I make it ever so often and is one of the few recipes that I remember by heart (kind-of). There are quite a few variations of the Panzanella salad out there, the one given below is broadly what I stick to based on the ingredients I have on hand.

Serves: 2 as main dish

INGREDIENTS:
Bread Croutons (homemade or store bought)
1 handful of salad leaves (optional)
2-3 handful of cherry tomatoes - halved
1/2 red onion
1 small green pepper
1 small red pepper
1 garlic clove - minced
2 tbsp - fresh basil leaves - chiffonade
2 tbsp Vinegar (Rice or Apple Cider)
2 tbsp Olive oil + 1 tbsp for making croutons
Salt
Pepper

NOTES:
- For making the croutons, you can use any bread - I used the multi-grain bread that I usually have on hand.
- A classic panzanella does not include salad leaves, but I tend to add a fistful to add a bit of crunch.

PROCESS:
  1. If you are planning to make the croutons at home - its a pretty simple process. Tear 2 slices of bread into bite sized pieces. (You can use any bread -I used the multi-grain bread that I usually have). Put them in a bowl and drizzle olive oil (1tbsp) and mix well. If you want you can sprinkle a bit of salt and pepper as well - I dont. Spread the bread pieces in a single layer on to a parchment lined baking tray and put them in the oven at 400F for about 7 minutes. 
  2. Prep the Veggies: Cut the cherry tomatoes into half and dice the onion. Dice the peppers and mince the garlic clove. Chop basil leaves.
  3. Mix all the veggies and basil in a bowl. Top with the freshly made bread crumbs. 
  4. Drizzle the oil and vinegar. Add salt and pepper to taste.
  5. Let the salad for about 10-15minutes for the flavors to develop. You can eat it even later but be careful to add the bread just before eating otherwise it would become soggy.


Friday, June 26, 2015

Rainbow Chard & Strawberry Salad

This is a salad that I have been making for quite some time. It makes for a really refreshing summer meal that has nice sweet and sour notes. I really don't follow any strict measurements and just mix the ingredients in the quantity that looks good in my salad bowl. I made this salad again yesterday but forgot to take pictures - will whip it up again soon and post some photos. Till then here is how to go about it:

INGREDIENTS

  • 5-6 leaves and stalks of rainbow chard - finely chopped (can you any kind of chard)
  • 1 handful of strawberries - sliced
  • 1 handful of cherry tomatoes - halved
  • 1 tbsp honey
  • 2 tbsp olive oil
  • juice of 1/2 lime
  • Lightly Roasted walnuts (optional)
  • Goat cheese (optional)
  • salt & pepper
PROCESS
  1. Cut the chard into thin slices.
  2. Add the chopped strawberries and tomatoes
  3. Dressing: Mix the olive oil+honey+lime juice and salt pepper in a small bowl
  4. Drizzle the dressing on the salad - if need be mix in additional honey or lime juice depending how sweet or sour you want it to be
  5. Toast the walnuts on a low flame till they are fragrant.
  6. Garnish with roasted walnuts and goat cheese

Thursday, June 18, 2015

Thai Style Green Lentils with Avocado Relish


It has been a while, I posted a new recipe here. The past few weeks went by in a blink of an eye. Anyways, I am back in the kitchen making good old favorites along with trying my hand at a few new concoctions. This dal was one such meal - its was pretty easy to put together provided you had all the ingredients on hand. It turned out to be a simple healthy meal with a mild thai flavor.

INGREDIENTS:
  • 1 cup French (Puy Lentils)
  • 1-2 Tbsp coconut oil
  • 1 Tbsp green thai curry spice mix (optional)
  • 2-3 one inch lemongrass stalk (optional)
  • 1  tsp cumin seeds
  • 2 tsp coriander powder
  • 1 tsp turmeric powder
  • 1/4  tsp chili powder (cayenne powder)
  • 2 large garlic cloves - minced
  • 1 inch ginger piece - minced/grated
  • 1 small tomato - pureed
  • 1 can coconut milk (full fat)
  • Juice from 1/2 a Lime
  • Handful of fresh cilantro - chopped
  • salt and black pepper to taste
NOTES: 
- You can use any type of whole lentils - Sabut Urad (Black Beluga) would work very well here.
- The thai seasonings such a lemongrass and green curry spice add a wonderful flavor to the dish but you can definitely make it without them. It might not be as aromatic but would still be pretty good.
- I don't hate/avoid fats especially plant based fats and that is why I always use full fat coconut milk - if you feel the need you could swap it for a low fat version.
- My dal turned out to be very dark - blackish in color because of the cast iron pot that I had used. If you make it in a stainless steel pot, yours might have a yellowish tinge to it.

PROCESS:
  1. Soak the lentils for at least 3-4 hours and then pressure cook them with about 3 cups of water. If you do not soak the dal - you might end up cooking a bit longer. If you do not have ot want to use a pressure cooker,  you could also cook them on a low flame in a normal covered pan for about 40-60 minutes. 
  2. Heat the coconut oil in a big heavy bottomed pot - I used my cast iron dutch oven for this. Add the thai curry spice mix+lemongrass+cumin+coriander+turmeric+chili powder.  Toast them for about a minute - till get fragrant and change color.
  3. Add the minced garlic and ginger along with salt and pepper - cook for 30 secs.
  4. Add the tomato puree and let it cook for about 15-20 minutes on low flame - till the tomatoes are fully cooked and all excess water has disappeared. 
  5. Once your above tadka (spice mix) is done - mix in the cooked lentils to it. (Alternatively, you could also add the soaked but uncooked lentils at this point and let the cook with the spice mix for about 40 minutes.)
  6. Once the lentils are cooked - add the coconut milk, lime juice and fresh cilantro.
  7. Adjust the seasonings and serve it in bowls  - top the bowls of dal with avocado relish (Recipe Below). You could eat the dal with a side of rice or any other grain, we however loved it just as it is.

Avocado Relish
INGREDIENTS
  • 1 large avocado diced
  • 2 green onions - chopped
  • Juice of 1 lime
  • 1 Tbsp olive oil
  • 1/2 tsp honey
  • 1/2 tsp red chili powder or chopped fresh green chili
  • 1/4 cup fresh cilantro - chopped
PROCESS
  1. In a mixing bowl - add the chopped avocado and green onions. 
  2. Whisk the honey, oil, lime juice and chili powder separately and add it to the mixing bowl.
  3. Sprinkle with chopped cilantro.

Wednesday, June 3, 2015

Cacao v/s Cocoa


I use cacao powder in all my recipes that ask for chocolate or cocoa. This is one of my favorite cookie recipes. I had been thinking of writing  a brief on the basic difference b/w the two and their respective benefits.

The basic difference between cacao and cocoa is that Cacao is raw and minimally processed. It is made by cold-pressing unroasted cacao beans. The process keeps the living enzymes and removes the fat (cacao butter). It is considered to be the biggest source of antioxidants and magnesium. There are three natural by-products of the cacao tree and I use and love all three of them - Cacao butter, powder and nibs.
The Cacao fruit tree produces cacao pods which contain the cacao beans. The outer lining of the inside of the cacao bean is the fattiest part of the fruit which is buttery in texture and resembles white chocolate in taste and looks - this is called cacao butter (I make an awesome cacao butter moisturizer at home- will post the recipe soon).
After removing the cacao butter, the bean is then used to make raw cacao powder. You can use this powder in baking, smoothies, milk shakes etc.
And cacao nibs are simply raw cacao bins crushed to bits.

Cocoa on the other hand is the heated form of cacao that is more popular and commercially more easily available. Cocoa despite going through higher temperatures of heat during its processing still manages to retain surprising high level of antioxidants. If you are buying cocoa choose a version with no added sugars, milk fats and oils.

Chocolate bar - When buying chocolate choose the one with really high cocoa content - at least 60-70% or higher. The higher the cocoa content the darker the chocolate and it also means that it has less amount of other not-so-healthy ingredients such as sugars, processed oils, flavorings etc.

A high quality chocolate should contain just about 3 to 4 ingredients: chocolate, cocoa butter/ cocoa mass, and/or cocoa liquor, plus sugar. Anything beyond that is all crap such as milk or milk products, any oil, soya lecithin, emulsifiers, ‘natural flavour’, or preservatives.
Finding out how your chocolate was processed might be a super tedious process but it will tell you a lot about how healthy your chocolate actually is - Drying cacao beans in the sun instead of roasting them preserves many of the chocolate’s delicate nutrients. Make sure that their processing temperature is not over 110°F. Avoid chocolate whose processing includes “Dutching”, an alkalization method that actually removes the polyphenols, which add the characteristic bitter flavor to the finished product.

I buy my cacao products from the bulk section of my health food store. If I am correct, Whole foods carry Nutiva brand cacao and cocoa powder which are organic although I do not know much about how they process it.

Tuesday, June 2, 2015

Cacao & Peanut Butter Cookies

This recipe originally was made with Cocoa powder and dark chocolate bits - I made a few changes and used cacao powder and nibs as I prefer Cacao over cocoa. I personally do not find any difference between the taste of the two but that's probably because I am used to it.
They did turn out to be pretty tasty - although I was not happy with the amount of sugar that went into it. Though in my 2nd try I replaced regular sugar with coconut sugar and the cookies tasted just as good.
The best part about these cookies is that you can make them completely gluten free (current version) or vegan (use nut milk) or nut free (use seed butter) depending on your personal preference.

Makes about 12 large cookies
Ingredients:
WET INGREDIENTS:
  • 1 tablespoon ground flax mixed with 3 tablespoons water
  • 1/4 cup virgin coconut oil (do not melt)
  • 1/4 cup peanut butter (Can replace with almond or sunflower seed butter)
  • 1/3 cup sucanat
  • 1/3 cup coconut sugar (can use normal sugar)
  • 1 teaspoon vanilla bean or vanilla extract
DRY INGREDIENTS:
  • 1/2 teaspoon baking soda
  • 1/2 teaspoon baking powder
  • 1/2 teaspoon fine grain sea salt (optional)
  • 3 tablespoons cacao powder (can use cocoa as well)
  • 1.5 cups rolled oats, processed into flour (or 1.5 cups oat flour)
  • 3-4 teaspoons milk -only if needed to moisten batter 
  • handful of cacao nibs (can use chocolate chips)
Directions:
  1. Preheat oven to 350F and line a large baking sheet with parchment paper. 
  2. In a large mixing bowl, mix together the flax and water and set aside for a few minutes so it can thicken up. Whisk the flax egg again once thickened.
  3. Add the rest of the wet ingredients into the bowl with the flax egg (coconut oil, peanut butter, sucanat, cane sugar, and vanilla). With a hand-held electric mixer, beat the ingredients until combined and smooth.
  4. Now, beat in the dry ingredients, one by one, as you go down the ingredient list (baking soda, baking powder, salt, cacao powder, oat flour). If your dough is a bit dry, add a few tea-spoons of milk and beat the mixture again. The dough should be moist enough to form balls without cracking, but not super sticky.
  5. Beat the cacao nibs into the batter or simply stir by hand.
  6. Shape balls of dough (about the size of a golf ball or 2 heaping tablespoons) and place on the baking sheet 2-3 inches apart. Gently press down on each ball with your hand to form a disc (it should be 1/2-inch thick or so).
  7. Bake for about 12-13 minutes (I baked for 13 mins) until the cookies are spread out nicely.
  8. Cool cookies on the baking sheet for 7 minutes or so and then transfer to a cooling rack for another 10-15 minutes.