This blog is my collection of healthy recipes and other health and nutrition related information from all over the web. This is just my way of sharing all the healing goodness with my family and friends.
Showing posts with label Dinner. Show all posts

Tuesday, July 28, 2015

Spinach Khichdi

Khichdi is my go-to comfort food. It is my kind of fast food - healthy, easy and quick to make. For the longest time I used to make Khichdi in the simplest way possible - Mix rice & green mung dal, add salt and pressure cook it. The only fancy thing that I did to my khichdi was top it off with a spicy salad of diced onion and tomatoes.
Off late I have been trying to make khichdi with some variations and the results have been pretty good. The main theme is still a simple mix of dal and rice but the small tweaks have brought a fresh flavour to a good old favorite. In this recipe, adding spinach increases the nutrient value of the khichdi and its still a simple one-pot meal. I make this often especially when I have some extra spinach on hand that needs to be finished. There are a couple of different ways to incorporate spinach into the khichdi, I have put the options in the Notes below:

INGREDIENTS:
1/2 cup yellow mung dal
1/2 cup masoor dhuli dal
1/2 cup rice
3 cups spinach - finely chopped (can add more)
3 cups water
salt
1/2 tsp turmeric powder
Tadka/Tempring
1 tbsp ghee
1tsp cumin seeds
1 tsp garlic -minced
1-2 whole red chillies
2-3 tejpatta
1 pinch heeng/asafetida
1/4 tsp garam masala (optional)

NOTES:
-Spinach: I simply chop the spinach and add it to the pressure cooker along the dal and rice - this is the simplest way to approach this one pot meal. You could chop and blanch the spinach separately and add it to the khichdi mix once its cooked - you will need to cook it a bit more after addign the spinach. Another alternative is to simply blend the raw spinach into a smooth paste and add it to the cooked khichdi - again you would want to cook the mixture for a few minutes once you add the spinach. In all the above options, tadka is the last step in the recipe.
-If you want your khichdi to be more fancy, you could also add another layer of tadka to the cooked khichdi - starting with minced ginger-garlic in a 1tbsp of ghee. Followed by chopped onion and chopped tomatoes.

PROCESS:

  1. Cook the the washed lentils, rice and spinach mixed with 3 cups of water in a pressure cook. It usually takes 2 whistles on medium flame. Add more water if you feel the khichdi looks too dry.
  2. Het ghee in a pan and add the cumin seeds, followed by minced garlic. Then add the tejpatta and red chillies. Add the hing.
  3. Add this tadka to the khichdi and mix it well and let the khichdi simmer for a couple of minutes. Add the garam masala if using. At this point, adjust the seasoning and add water to make the consistency as per your liking.
  4. Khichdi is ready to be served.


Thursday, June 18, 2015

Thai Style Green Lentils with Avocado Relish


It has been a while, I posted a new recipe here. The past few weeks went by in a blink of an eye. Anyways, I am back in the kitchen making good old favorites along with trying my hand at a few new concoctions. This dal was one such meal - its was pretty easy to put together provided you had all the ingredients on hand. It turned out to be a simple healthy meal with a mild thai flavor.

INGREDIENTS:
  • 1 cup French (Puy Lentils)
  • 1-2 Tbsp coconut oil
  • 1 Tbsp green thai curry spice mix (optional)
  • 2-3 one inch lemongrass stalk (optional)
  • 1  tsp cumin seeds
  • 2 tsp coriander powder
  • 1 tsp turmeric powder
  • 1/4  tsp chili powder (cayenne powder)
  • 2 large garlic cloves - minced
  • 1 inch ginger piece - minced/grated
  • 1 small tomato - pureed
  • 1 can coconut milk (full fat)
  • Juice from 1/2 a Lime
  • Handful of fresh cilantro - chopped
  • salt and black pepper to taste
NOTES: 
- You can use any type of whole lentils - Sabut Urad (Black Beluga) would work very well here.
- The thai seasonings such a lemongrass and green curry spice add a wonderful flavor to the dish but you can definitely make it without them. It might not be as aromatic but would still be pretty good.
- I don't hate/avoid fats especially plant based fats and that is why I always use full fat coconut milk - if you feel the need you could swap it for a low fat version.
- My dal turned out to be very dark - blackish in color because of the cast iron pot that I had used. If you make it in a stainless steel pot, yours might have a yellowish tinge to it.

PROCESS:
  1. Soak the lentils for at least 3-4 hours and then pressure cook them with about 3 cups of water. If you do not soak the dal - you might end up cooking a bit longer. If you do not have ot want to use a pressure cooker,  you could also cook them on a low flame in a normal covered pan for about 40-60 minutes. 
  2. Heat the coconut oil in a big heavy bottomed pot - I used my cast iron dutch oven for this. Add the thai curry spice mix+lemongrass+cumin+coriander+turmeric+chili powder.  Toast them for about a minute - till get fragrant and change color.
  3. Add the minced garlic and ginger along with salt and pepper - cook for 30 secs.
  4. Add the tomato puree and let it cook for about 15-20 minutes on low flame - till the tomatoes are fully cooked and all excess water has disappeared. 
  5. Once your above tadka (spice mix) is done - mix in the cooked lentils to it. (Alternatively, you could also add the soaked but uncooked lentils at this point and let the cook with the spice mix for about 40 minutes.)
  6. Once the lentils are cooked - add the coconut milk, lime juice and fresh cilantro.
  7. Adjust the seasonings and serve it in bowls  - top the bowls of dal with avocado relish (Recipe Below). You could eat the dal with a side of rice or any other grain, we however loved it just as it is.

Avocado Relish
INGREDIENTS
  • 1 large avocado diced
  • 2 green onions - chopped
  • Juice of 1 lime
  • 1 Tbsp olive oil
  • 1/2 tsp honey
  • 1/2 tsp red chili powder or chopped fresh green chili
  • 1/4 cup fresh cilantro - chopped
PROCESS
  1. In a mixing bowl - add the chopped avocado and green onions. 
  2. Whisk the honey, oil, lime juice and chili powder separately and add it to the mixing bowl.
  3. Sprinkle with chopped cilantro.

Saturday, February 21, 2015

Roasted Ratatouille with Rice

This is one of my favorite dinner dishes. It requires a little bit of effort in chopping and dicing but that's about it. The best part of this recipe is that you can make it with whatever vegetables you have in your fridge.


INGREDIENTS
2-3 handfuls of cherry tomatoes
1 small eggplant - diced
1 zucchini - diced
1 squash - diced
2 small carrots - diced
1 red/yellow bell pepper - diced
1 medium yellow onion - diced
3 garlic cloves - crushed

6 tbsp olive oil
2 tbsp balsamic vinegar
salt & pepper
red pepper flakes
3 tbsp Fresh basil (about 10 leaves)- chopped
1tbsp fresh or dried oregano
1tbsp fresh thyme (optional)

Process:

  1. Pre-heat the oven to 400F. 
  2. Dice all the veggies together - I cut them to about 1 inch sized pieces. Put them in a big mixing bowl.
  3. Add about 3-4 tbsp olive oil+ balsamic vinegar+ garlic+ salt, pepper and red pepper flakes to the veggies and mix well. Then spread this mixture in one even layer on the baking tray. I use a lasagna tray to make such veggies - so I just mix all the spices directly in the tray (saves me from using an extra one dish)
  4. Chop the cherry tomatoes in half and put them in another pan and add 2 tbsp olive oil + little bit of salt and pepper.
  5. Put the veggies in the upper rack of the oven and the tomatoes in the lower rack and set the timer to 20 mins.
  6. After 20 mins, check your veggies - I like them a bit brown on the edges - so usually keep them for additional 5-7 mins. The tomatoes will be definitely done in 20 mins and would be bursting with juices.
  7. Once the veggies are done as well- mix the tomatoes in them and add the chopped/dried herbs - basil+oregano+thyme 
  8. Serve the veggies on a bed of rice or spaghetti . We usually eat them with rice.


Friday, February 6, 2015

Burrito Bowl

When I first arrived in the United States, the only fast food that I actually took a liking to was the burrito bowl at Chipotle. I remember eating it at least once a week during the first few years. Ever since then Chiptole has been our go-to place for non-greasy and tasty fast food. I had been thinking of creating the burrito bowl at home since the ingredients looked simple enough but the ease of a Chipotle pick-up always put my grand plans on hold. Anyhow, cut to a few months back and I finally tried making the burrito bowl at home and it turned out way way better than I expected.

I made it again recently on Super bowl Sunday and thought of posting it here. Let me tell you once you go home-made it will be hard to go back to the store made stuff - it is that good. Another thing I want to point out is that please don't be discouraged by the long list of ingredients- it might take some time but all of them are relatively easy to put together.

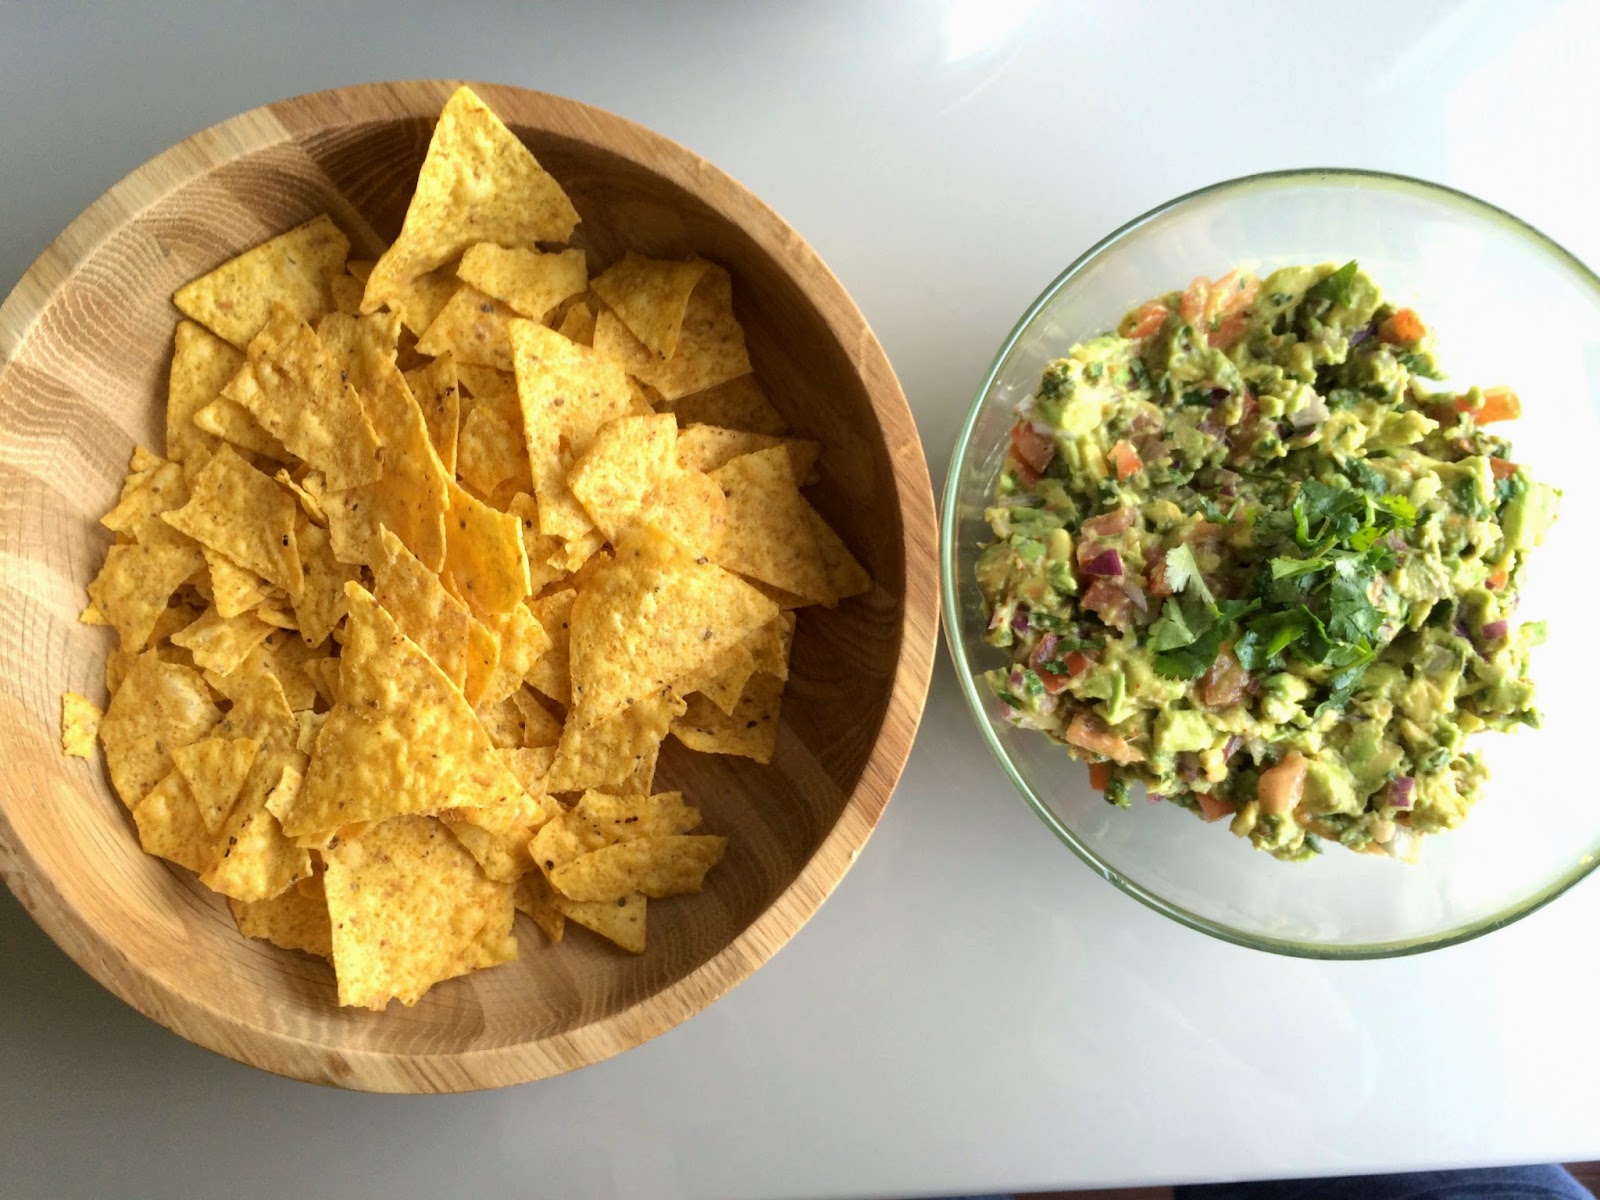
                         You need to make Rice, Beans, Fajitas, Tomato Salsa & Guacamole


INGREDIENTS
Cilantro -Lime Rice
2 cups of Jasmine or Basmati Rice
4 cups of water
1 tbsp ghee or butter
Juice of 1 lime
1 cup of cilantro - chopped
1.5 tsp Cumin Powder
Salt to taste

Beans:
1 cup kidney beans (rajma) soaked overnight

Fajitas:
2-3 medium sized bell peppers (preferably green) - sliced
1 big red onion - sliced
1 tbsp of ghee or coconut oil

Tomato Salsa:
2 large tomatoes - finely diced
2 tbsp red onion- diced
1 garlic clove - minced
1/2 green chilli - diced (I used Serrano pepper)
handful of chopped cilantro
salt to taste
a pinch of sugar
juice of 1 lime

Guacamole:
2 Avocados - pulp
2 Tomatoes - de-seeded and diced
1/2 medium red onion - diced
1 garlic clove - crushed
Juice of 1 lime
handful of chopped cilantro
1 tsp cumin powder
salt and chilli powder to taste

Lettuce: Shredded (optional)

NOTES:
  • You can use either brown or white rice. I used white basmati rice.
  • You can use Jalapeno or Serrano peppers - just err on the side of caution and add it in portions.
  • I have seen Roma Tomatoes work best for Guacamole as they have less juice and pulp. 
  • When I am in hurry, instead of making guacamole, I just use chopped avocados.
Process:
Rice 

  1. Start by making the rice first. Wash the rice and put them along with 1 tbsp of ghee and water in the pan to cook just like you would regular rice.
  2. You should add the chopped cilantro, lime juice, cumin powder and salt after the boiling stage i.e at the simmering stage, when the rice is about to be done and there is a little bit of water left. 
  3. Mix well and keep it covered. Remember the key ingredients that will make this rice similar to the one at Chipotle are lime juice and cilantro - so adjust the seasoning as per your flavor.
Beans:
Pressure cook the soaked beans - you just need to add little bit of salt to them

Fajitas:
In the meanwhile, slice the peppers and onions and saute them in a pan and cook them to your preference. You can sprinkle a little bit of salt on these too.

Tomato Salsa:
Mix all the ingredients well in a bowl and adjust the seasoning according to your taste.

Guacamole:
  1. Remove the Guacamole pulp and add the diced tomatoes, onion and garlic along with all the other spices - cumin, salt and chili powder. 
  2. It's a good idea to take out the pulp and juice of tomatoes - otherwise your guacamole will turn out to be too soggy and liquidy.
Serve: Start with a bed of rice, add the beans and fajitas and garnish with tomato salsa, guacamole and lettuce. You can top it with bit of Sriracha and a few spoons of yogurt.


Saturday, January 24, 2015

Asian Style Green Beans

Let me start by saying that this is by far the easiest way to make beans - the only work involved is the time it takes to chop up the beans. It's one of the meals that I end up making at least once a month because its so simple and not to mention super tasty. The recipe involves one special sauce - Hoisin Sauce - I suggest you not to skip it as it forms the base for the recipe. We usually serve this over a bed of grain - rice, quinoa, millet, barley whatever I have on hand.

INGREDIENTS:

  • 1 pound green beans - cut into 1 inch pieces
  • 1 tbsp Sesame oil (or any other oil)
  • 2-3 scallions - chopped only the green part (optional)
Sauce:

  • 1 clove garlic - minced
  • 1 inch (2tsp approx) ginger - minced
  • 2 tbsp Hoisin Sauce ( I use this brand)
  • 1-2 tbsp Rice Vinegar
  • 2 tsp toasted sesame oil
  • 2 tsp soy sauce
  • 1 tsp red pepper flakes

NOTES:
  • Plz keep in mind that tbsp= table spoon & tsp=tea spoon

PROCESS:
  1. Cut the green beans into 1 inch pieces
  2. Heat the sesame oil in a pan on medium heat. Add the green beans and sauté them for about 5-7 minutes. Cook them to your desired preference - I like ours a bit crunchy so I keep an eye on them and stir quite frequnetly
  3. Mix the sauce ingredients together and add it to the cooked beans - stir to coat all the beans and cook for about 1 min
  4. Serve immediately over the grain of your choice.


Saturday, January 17, 2015

Squash & Kale Salad

This winter, I have been on a squash roll - I have used them in so many new recipes and have loved every one of it. This is another squash salad recipe which turned out to be really yummy. This salad uses Kale - previously whenever I added kale to a salad - I massaged it with oil to make it soft and less chewy. This recipe however asked to cook kale for a bit which honestly I was skeptical about as I really don't like cooking my greens - but here they needed to be on the pan for just about a minute and turned out to be much less work than having to massage them.
Btw, here is an image identifying different kinds of squash available:


INGREDIENTS:

  • 1 small Acorn Sqash
  • 1 large bunch Lacinato Kale
  • 1/3 cup Hazelnuts
  • 1/3 cup tahini
  • 1/3 cup white miso
  • 1/3 cup dried cranberries
  • 1 big garlic clove - crushed
  • 1 small shallot - minced
  • 1juice of lemon
  • Coconut Oil
  • Salt & Pepper

Notes:
  1. The recipe used Red Kuri squash but I had Acorn squash at home and used that.
  2. Also, I didn't have any shallots so I skipped that.
  3. This is the Miso brand I use,

PROCESS:

  1. Preheat oven to 350F
  2. Cut the squash - remove all the seeds and strings - slice the squash in small half moons, sprinkle a bit of oil, salt and pepper over it and roast it for about 25 mins in the oven or until its soft.
  3. Make the dressing by combining Tahini+Miso+garlic+shallot +lime juice+salt+pepper. Add additional water to create a smooth creamy consistency (a couple of tablespoons)
  4. Wash the kale and remove the stems and roughly tear the leaves into smaller pieces.
  5. Put a little bit of coconut oil in a pan and cook kale for a couple of mins till its wilted - I cooked kale in two separate batches in my cast iron pan -they cooked faster that way as they had enough room.
  6. Put the hazelnuts in small pan over medium heat and cook till they are lightly brown and fragrant - then chop them into smaller pieces.
  7. Serve: Put cooked kale, top it with roasted squash, cranberries, hazelnuts and drizzle the dressing.


This is by far the best pic, I have taken for the blog so far!!

 
Recipe Source: A house in the hills


Wednesday, January 14, 2015

Spicy Eggplant & Chickpea Salad

This is one of my all time favorite dishes  - I absolutely love the flavor and the texture that the mix of veggies bring out. It's pretty simple to make and doesn't require much prep except that you need to soak the chickpeas (chole) well in advance. I usually make this for dinner, but I suppose it would make for a yummy lunch option too. I know there are people who are not big fans of eggplant and I have one such person in my family but even he loves this version of eggplant, so I suggest you give it a try.

Serves 3

Ingredients:
  • 1 medium size eggplant 
  • 2 Persian cucumbers (1 regular cucumber)
  • 1 cup uncooked chickpeas (or 1.5 cups cooked)
  • 1 medium red onion
  • 1 red pepper
  • Cilantro
  • Roasted peanuts (optional)
  • 1 tsp salt 
  • 1 tsp garlic powder
  • 1 tsp chilli powder
  • 1/2 tsp cumin
  • 1/2 tsp turmeric
  • Olive oil
Dressing
  • 1/4 cup rice vinegar
  • 1 to 1.5 tbsp honey
  • salt to taste
Process:
  1. Preheat the oven to 400F
  2. In a bowl mix all the dry spices - 1 tsp salt + 1 tsp garlic powder + 1 tsp chili powder + 1/2 tsp cumin powder + 1/2 tsp turmeric powder.
  3. Put the chickpeas in a cooker or pan and let them get fully done (2-3 whistles in a cooker)
  4. While the chickpeas are cooking, chop the eggplant into bite sized pieces (about 2 inches wide at most) and sprinkle half of the above spice mix along with 1 tbsp of olive oil to the eggplant. Mix well and roast it in the oven for about 20 mins or till its fully cooked.
  5. Once the chickpeas are done, drain the water completely - I use a strainer and let them sit in it for a few minutes. Now mix the remaining half of the spice mixture to the chole
  6. Dice the cucumbers, red pepper and onion and cilantro and mix them all in a bowl.
  7. Stir together the dressing ingredients in another small bowl and add it to the above cucumber mix. You can adjust the dressing as per your taste - you want the mixture to be mildly sweet and sour so pour dressing a bit conservatively on your first go.
  8. Serve: Place the cucumber mix on each plate, top it with the chickpeas and roasted eggplant. Garnish with additional cilantro and roasted peanuts and eat it alone or with chapatis or pita bread. We love it simply on its own.
Cucumber Mix 
Roasted Eggplant
Chickpea Mix


Sunday, December 21, 2014

Asparagus & Beets Stir Fry

Like most of the recipes posted so far, this one too involves minimal effort but with oh- so spectacular results. This recipe was recommended by a dear friend - Gaurav who is
incredibly creative in the kitchen.


Ingredients

  • 1 bunch Asparagus 
  • 1 medium onion - sliced
  • 2 medium beets
  • 2 cloves of garlic - whole
  • 1/2 cup cherry tomatoes - sliced
  • 2 eggs -boiled
  • 2 oranges
  • some kind of cheese (optional)
Process
  • Preheat the oven to 350 degrees F. Chop the beets into bite sized pieces - place them on a tray - spray with little bit of olive oil and salt and pepper. Let them cook for about 20-30mins. (Mine took about 20 mins)
  • Put the eggs for boiling on the side
  • Take a pan, add olive oil and sauté the whole garlic cloves till they are fragrant. 
  • Add the sliced onions and let them cook for a couple of minutes and then add the cut asparagus Let them cook for a few minutes - till they are done to your liking. I like mine a bit crunchy.
  • Mix the cooked beets to this mixture
  • Garnish with - cut cherry tomatoes, boiled eggs and orange slices.
  • Serve while still warm

Tuesday, December 16, 2014

Zucchini Pasta with Roasted Pumpkin Sauce

Let me begin by saying that I have been a lifelong hater of pumpkin, I tried the typical Indian veggie version of it as a kid and immediately disliked it and have not had it ever since. However, off late I have been exploring new ways to eat pumpkin/squash - there are so many great recipes out there. The first one I tried was this and I absolutely loved it. I have eaten Zucchini noodles with summer veggies but adding the pumpkin sauce makes it perfect for winters. A word of caution - do not make this recipe expecting it to taste like your regular pasta - it will not - the flavors are rich but still will need some getting used to (or maybe it's just my pumpkin fear that's coming out)

To make noodles out of veggies, I use this simple spiralizer and it works great for me. I am planning to graduate to this one soon - which will work better, if you are cooking larger quantities or have the storage space for it.  

Serves: 4
INGREDIENTS
  • 4 large zucchini
Pumpkin Sauce
  • 1 sugar pumpkin - roasted then pureed
  • 1 medium green apple (swapped it with lime juice)
  • ½ cup fresh sage - chopped
  • 1 cup full fat coconut milk
  • 1 tbsp roasted pumpkin seed oil (can skip it - I didn't have any)
  • Juice of 1-2 oranges
  • 2 tbsp tahini
  • 2 cloves garlic
  • ½ tsp ground nutmeg
  • 1 tsp ground cinnamon (using some for baking)
  • pinch of turmeric
  • black pepper
  • sea salt to taste
  • Garnish: roasted pumpkin seeds, dash of cinnamon, fresh black pepper, roasted pumpkin seed oil (optional)

INSTRUCTIONS
  1. Preheat oven to 350 degrees F
  2. Slice the sugar pumpkin in half, placing the flesh side up. Sprinkle little bit of cinnamon powder. 
  3. Bake the pumpkin on a well greased baking sheet for 45 minutes or until tender. 
  4. Scoop out the pumpkin from it's skin, puree the pumpkin with all remaining sauce ingredients.
  5. Adjust seasonings to taste - I had to add more lime juice
  6.  Transfer the pumpkin puree into a pot on the stovetop to heat through again. 
  7. Make Zucchini noodles and serve with pumpkin sauce on top and garnish with roasted pumpkin seeds, cinnamon and black pepper. 
NOTES:
  • I had leftover sauce, which made for a yummy evening soup the next day - just added little bit of more water and heated it.
  • Since the size of pumpkins vary a lot - the seasonings will require some major adjustments. I had to add at least juice of 1 lime to make it work for my palette. 
Recipe Source: Nutrition Stripped


Monday, December 8, 2014

Millet & Broccolini Salad

This is one of the few non-raw meals which I make pretty often for lunch. I love the idea of incorporating different varieties of grains in our diet especially with the wheat heavy Indian diet that most of us are used to. Millet can sometimes feel a bit dry - so I try and take it off the stove when it's still a little moist.


Here are some of the Benefits of Millet:
  • Gluten free
  • Alkaline in nature - thus help balance the pH levels
  • Good source of fibre
  • Low Glycemic index than wheat and rice
  • High in protein - 1 cup cooked contains about 12-15% of your daily protein intake
  • Niacin (Vit-B3) in millet can help lower cholesterol and helps in reducing triglycerides.
  • It acts as a prebiotic - thus help feed the microflora (the good bacteria) in your system
  • Only CON: Potential Goitrogen - People with thyroid problems should take millet in moderation because it contains goitrogens that might suppress thyroid activity. Unlike cruciferous veggies like broccoli, cabbage and cauliflower where cooking reduces the goitrogen levels, millet's goitrogen levels infact increase when cooked.

Ingredients:
  • 1.5 cups dry millet (I use Pearl Millet - pictured above)
  • 3 cups water
  • 2 tbsp coconut oil
  • 2 bunches of broccolini or baby broccoli
  • handful of pitted kalamata olives - chopped
  • 2 tbsp fresh parsley or cilantro
  • handful of pine nuts + more to garnish

Vinaigrette:
  • 4 T fresh pesto (recipe below)
  • 4 T balsamic vinegar
  • serious pinch of sea salt
METHOD:
  • Dry toast millet in a saucepan for a few minutes until nutty and brown. (If in a hurry, I skip this step and directly boil it)
  • Add water and bring to a boil. Cover and turn down heat to a simmer. Cook for about 10-15 minutes. 
  • Roughly chop the broccolini, pour some coconut oil, sprinkle with a couple pinches of sea salt and roast in the oven for 10 minutes or until crispy. (Can totally do this in skillet)
  • Mix the cooked millet, roasted broccolini, kalamata olives and parsley in a bowl
  • Combine the dressing ingredients and mix well and add it to the millet mixture
  • Add more salt to taste.
  • Garnish with pine nuts

Pesto Recipe
  • 3 cups fresh basil, sans stems
  • 1/2 cup olive oil (I use much less oil- and add it progressively to get the right consistency)
  • 1/2 cup pine nuts
  • 4 small/medium cloves of garlic
  • sea salt
the how: throw it all in a food processor and blend. Add salt to taste

Recipe Source: A house in the hills

    I garnished this with a boiled egg

    Saturday, October 25, 2014

    QUICK RED LENTIL AND SPINACH CURRY

    Serves: 3-4
    Ingredients:
    • 1½ cups whole-fat coconut milk
    • 1½ cups water
    • ¼ cup red curry paste (I use the regular masala mix: dhaniya+haldi+bit of garam masala)
    • ¾ cup red lentils
    • 2 cups packed baby spinach
    • 4 cups cooked brown rice or quinoa
    • Plain yogurt, garnish
    Process:
    • In a skillet with high sides, whisk together coconut milk, water and curry paste. Bring to a boil, reduce to a simmer, and add red lentils. Let simmer for 22 to 25 minutes, just until the red lentils are tender but still hold their shape.
    • Remove pot from heat and stir in spinach until wilted. Serve curry over cooked grain, with a dollop of yogurt, if desired.
    Recipe Source: Naturally Ella


    Monday, October 20, 2014

    Healthy Indian Risotto (Multigrain Khichdi)

    PS: My notes are in the underlined portion

    9 whole grains in one dish and many more vegetable included ... Wild rice/ Black Rice + brown rice broken basmati (tukda), pearl barley, chana daal (split chickpea), split black gram with skin, whole mung bean, horse gram and masoor dal (Can basically add any kind of dal or grain you have on hand)

    Ingredients.
    (5-6 servings) 
    • all the above stated grains and lentils mixed in equal quantities ...2 cups (I used half a cup/choti katori but that too made 5-6 servings. So change the quantity of all the ingredients below accordingly) 
    • broccoli and cauliflower cut in florets 4 cups each (I didnt use cauliflower)
    • green peas 2 cups
    • freshly made coarse paste of tomatoes 2 cups
    • carrots medium sized 2 nos.
    • medium sized celery sticks 3-4 nos. 
    • spring onions lower halves 3-4 nos.
    • garlic cloves 5-6 nos.
    • cumin seeds 2+1 tsp
    • freshly crushed black pepper corns 1 tbsp
    • red chilly powder 2 tsp
    • turmeric powder 2 tsp 
    • whole black cardamom 2 nos.
    • bay leaves 2-3 nos.
    • ghee or any oil of choice 2+1 tbsp
    • salt to taste 

    procedure...

    • First of all chop the celery, carrot, spring onions and garlic finely.
    • (I soaked the dals and grains for about 8 hours. If you do not soak them then you will need to add a lot more water when cooking) 
    • Heat the ghee in a pan and throw in the cumin seeds and wait till they crackle. Add the black cardamom and bay leaves and cook till they all become wilted and aromatic. Add the above chopped celery-carrots-garlic mixture...stir fry for a while ...(Do not overcook it. Just cook for 5-7 mins on medium heat.)  
    • Now add the tomato paste, salt and turmeric powder, the crushed black pepper corns and the red chilly powder too.. and add this mixture to the cooker and and then add more water, and gave it a quick whistle or two.
    • Meanwhile , place a kadhai on the other side of the stove for the broccoli and the peas to be stir fried ... while the khichdi is cooking in the pressure cooker. 
    • The cooked grains and pulses should look plump and soft when cooked ..not very mushed up but cooked thoroughly . 
    • So heat just a tbsp of ghee in a kadhai , add a tsp of whole cumin seeds and dunk in all the cut florets into it to fry ... add the green peas too, I also added some more chopped garlic and red chilly powder to this mixture as it makes the khichdi very flavorful....
    • Add the stir fried vegetables to the cooked khichdi and mix well .


    Just mix well and serve immediately ... a nice raita and some roasted papad is all that is needed . But i liked it by itself , with plain curd.