This blog is my collection of healthy recipes and other health and nutrition related information from all over the web. This is just my way of sharing all the healing goodness with my family and friends.
Showing posts with label Snacks. Show all posts

Thursday, July 9, 2015

Cherry Crostini

The cherry season is almost over here in the bay area but we are far from done with them. I found some very good ones from Oregon selling at my local store and I got home a big bag. I am mostly not in favor of cooking with fruits primarily because it feels like you are killing their awesome natural texture and juices.
But a few days back, when I caught a glimpse of this crostini on the pages of a magazine (Bon appetit to be exact), I was literally drooling - so much so that I made it that same evening. It's a pretty simple dish which would work as an awesome appetizer, we however had it for dinner.
INGREDIENTS:
1-2 tbsp olive oil
2 cups cherries - pitted and halved
baguette slices
fresh goat cheese
Coarse salt
fresh black pepper

NOTES:
- Buy the best quality goat cheese you can find and account for its salt content. Mine had no salt added.
- I did pit the cherries first, using the flat end of a chopstick. (It's not as hard or time consuming as it sounds).However, I later on realized that I could have simply cut the cherries in half and then thrown the pit. Try both options and see which one works best for you.

PROCESS:
  1. Heat oil in a cast iron skillet or a heavy bottom pan - keep the flame high
  2. Add cherries and cook them for about 5 minutes- stir frequently. The cherries should turn soft but not falling apart.
  3. Sprinkle the salt and pepper
  4. Smear goat cheese on baguette slices - top with a spoonful of cherries.


Saturday, May 9, 2015

Baked Potato Wedges

I am a big fan of healthier version of traditional recipes. These baked potato wedges are one such dish. Just by replacing the deep frying step with baking makes it infinitely healthier. And the best part is that they taste just as good. Trust me, give me them a try and you will be a fan forever:

INGREDIENTS:
5-6 medium/large golden potatoes
coconut oil to sprinkle
salt to taste
few pinches of red chilli powder/paprika (optional)

PROCESS:
  1. Preheat the oven to 400F 
  2. Bring a large pot of water to boil and add a teaspoon of salt to it
  3. Wash and cut the potatoes into wedges (keep the skin on)
  4. Cook potatoes in the boiling salted water for 7 minutes.  Remove form the stove and drain. Its v.imp not to let them cook for any longer as they would get overcooked and not become crispy. 
  5. Put the wedges in a mixing bowl and add the oil, salt and chili powder if using and mix well.
  6. Spread the wedges on a baking sheet and roast for about 17 mins - take them out and turn the wedges over and out them back in the oven for another 17 mins.
  7. Take them out when they turn crisp to your liking - squeeze lime juice over them or serve them any kind of sauce, with burgers or just enjoy them as it is.


Wednesday, April 8, 2015

Tofu Manchurian

This is the easiest and the tastiest way to make tofu. I was never a big fan of tofu until I tried it this way. I learnt this recipe from a friend's husband and it has been a favorite of mine ever since. I have made it for lot of people, most of whom were not fond of Tofu and it was always a hit. So if you are a tofu novice then this is the recipe to start with. The best part about this is that you can keep the sauce thick to serve it as an appetizer or make it more like gravy to serve with rice or any other grain. And did I mention it takes no more than 20 minutes to whip this up:

Serves 2

INGREDIENTS:
  • 4-5 bunches Scallions (Green onions) - only the green part
  • 8 0z Tofu (Firm) (Brand I use)
  • 1 tbsp ginger - minced
  • 1tbsp garlic - minced
  • Salt 
  • Pepper
  • 1 tbsp olive oil
Sauce
PROCESS:
  1. Chop the green part of onions and sauté them lightly for a couple of minutes - make sure you do not overcook them especially if you are making this as an appetizer. 
  2. Chop the tofu into 1 inch pieces and keep aside.
  3. Add the minced ginger and garlic 
  4. Mix in all the ingredients of the sauce - and add it to the green onions.
  5. Add salt and pepper  to taste - while adding salt remember that the dish already has soy sauce so you might need very little additional salt.
  6. Add tofu pieces
  7. Serve as it is or on a bed of brown rice or quinoa or any other grain of your choice.


Saturday, March 21, 2015

Almond Flour Biscotti

Here is the recipe of a vegan biscotti that I made a couple of weeks ago. It was my first attempt at making biscotti and it turned out to be pretty good. The process is quite simple and requires a few simple ingredients. The photos don't quite do justice to how good the actual stuff was.


INGREDIENTS
  • 1 1/2 cups almond flour
  • 1/4 cup walnuts or hazelnuts 
  • 1/4 cup dried coconut - shredded
  • 1/4 cup honey
  • 1.5 tbsp coconut oil (solid form)
  • 1/2 tsp baking powder
  • v small pinch of salt

NOTES:
  • I make my own almond flour by grinding whole almonds. 1 cup almonds plus a few more pieces will usually yield 1.5 cup almond flour. You can of course skip this step and get almond flour from the store.
  • I used walnuts here but they could very easily be substituted with any other nut such as hazelnuts or almonds.
  • You can also substitute honey for maple syrup in the same ratio.
PROCESS:
  1. Preheat the oven to 350F. 
  2. Chop the walnuts into small pieces - any big piece might end up cracking the biscotti.
  3. Combine all the dry ingredients - almond flour, chopped walnuts & dried coconut in a mixing bowl. Make sure that the almond flour has no lumps - if need be use a fork or your hands to break the lumps
  4. Now add the honey and coconut oil to this dry mixture. The important thing here is to use solid coconut oil (incase its warm and the oil is in liquid form then you can put in the freezer for a while before using)
  5. Use your hands to mix the honey and coconut oil well into the dry mixture - the mixture should turn into a soft dough.
  6. Place the dough on a parchment lined baking tray - and flatten it into a rectangle of about 10 inches long and 4 inches wide. Keep the thickness of the dough at 1 inch approx. Pat well to smoothen the dough to make sure there are no gaps or cracks.
  7. Place it in the oven and bake for 18 minutes - the edges should be brown by this time
  8. Take it out from the oven and let the biscotti cool fully - it would take at least 30 minutes. 
  9. Use a sharp knife preferably a serrated one to carefully cut the biscotti into 1 inch slices. Now slowly turn each of the slices - so that the reverse side is on top. The biscotti would be very fragile at this point so make sure you do this step very slowly to avoid breaking the slices.
  10. Put them back in the oven and reduce the temperature to 325F for an additional 10 minutes.
  11. Remove from the oven and let them fully cool and harden before serving. 
  12. You can store it at room temperature for about 10 days. Mine lasted for about 2 weeks.

Saturday, January 24, 2015

Pear and Apple Crumble


This was my first time making a crumble - I had seen lots of crumble recipes with a variety of fruits floating around the web but somehow they never caught my attention. And man am I kicking myself for not trying this out earlier. A fruit crumble like this one serves as a perfect weekend b'fast and the leftovers can help you satisfy your sweet cravings during the week. The recipe might look a bit elaborate but trust me its hard to mess this one up. I overcooked my oat flakes a bit much but they still tasted pretty good.

Serves 2

INGREDIENTS:

  • 1 pear
  • 1 apple
  • 2-3 tbsp raisins 
  • 1 tbsp honey
  • 1 tsp ginger -minced
  • 1 tsp vanilla essence
  • 1-2 pinch cinnamon - ground
  • 1-2 pinch nutmeg - ground
  • 1-2 tbsp lime juice
CRUMBLE

  • 1/3 cup rolled oats
  • 1/4 cup pistachios - ground
  • 4-5 fresh dates - pitted and chopped
  • 2-3 tbsp coconut oil - melted
  • 1-2 pinch cinnamon - ground
  • 1-2 pinch nutmeg - ground
  • 1 pinch of salt
NOTES:
The recipe I looked at was for a bigger batch - so the measurements here are my best approximation from that.

PROCESS:
  1. Preheat the oven to 375F
  2. Take a cast iron skillet or any oven proof pan - put all all of the chopped fruits and seasonings (except the crumble ingredients) in the pan - mix well to combine
  3. Cook this mixture for about 10 mins - till your fruits are tender
  4. Grind pistachios into flour - I used my coffee grinder for this
  5. Combine all the crumble ingredients in a bowl - mix it all well 
  6. Spread the crumble toppings evenly over the fruit mixture in the cast iron skillet.
  7. Bake at 375F for 30-40 mins. Check it at 20 mins and take it out once the crust os golden brown (I baked mine for a bit too long and it turned into a darker brown color)
  8. Take it out and let it cool for at least 15 mins - this allows the crumble topping to get nice and crunchy.
  9. Enjoy it with a cup of hot tea
  10. The leftovers stay good for 5-7 days in the fridge.


Saturday, November 22, 2014

Steamed Cabbage tikkis/cutlets

To be honest I had my doubts about how would this turn out to be - the idea of cabbage in pakoras didn't sound too appealing. But since I love the steamed Dal dumplings that I make regularly I decided to try them out - and to my surprise they were quite yummy and easy too. It makes for a quick snack on weekend afternoons. 
I tried two versions of this - one was plain steamed and the other was shallow fried on the tawa but difference here was that you fry them after they have been steamed thus reducing the amount of oil and time used. 

Ingredients:
1/2 cup besan (chickpea flour)
1tbsp suji
1 cup cabbage - finely chopped
1 tbsp each ginger+garlic+green chilly - paste
1 tsp haldi
1 tsp ajwain
handful of cilantro - chopped
salt
oil - I used coconut

Process:
  • Mix all the ingredients with a little water to form a thick paste - thick enough to form tikkis/cutlets
  • I used my steamer basket to steam them - grease the basket with little bit of oil and place the tikkis
  • Steam for 5-7 minutes approx - do the toothpick test to check if they are fully cooked 
  • If you want them fried then put the tikkis immediately on a hot tawa with a bit of oil - the outside will get crisp and brown pretty quickly.
  • Serve with any chutney - I like dhaniya chuntey with it. 
Recipe Source: Health Food Desi Videshi


Both steamed and fried versions

Wednesday, November 19, 2014

Spinach Carrot Muffins

These muffins make a tasty and healthy snack or can be eaten during lunch. I was super excited to make them over last weekend but the big bummer came when I realized I had forgotten to add baking powder to the mixture. By the time I realized my mistake, the muffins were already half baked - so the end result was not as fluffy and light as I had expected but I ate them nevertheless considering all the good stuff that went into them.

Makes 12 small muffins
Ingredients
  • 1 cup buckwheat flour
  • 1/3 cup cornflour (this is not corn starch but real corn flour)
  • 1 tsp baking powder (V.Imp)
  • 3 tbsp flax seeds - powdered
  • 1/2 tsp salt & pepper
  • 1/2 tsp nutmeg powder
  • 3 eggs
  • 1 cup yogurt 
  • 200 g fresh spinach leaves (roughly chopped)
  • 2 carrots (grated)
  • 1/2 onion (grated)
  • 1/2 lime (juice) 
  • 1 clove garlic (mashed)
  • top with: 1/4 cup pumpkin seeds


Process

  • Set the oven at 350°F.
  • Mix all the dry ingredients in a bowl and set aside. 
  • Whip egg and yogurt in another bowl. 
  • Add spinach, carrots, onion, lemon and garlic, stir for a minute and then add all the dry ingredients.
  • Pour in muffin tins, top with pumpkin seeds and bake for 25 minutes.
Recipe Source: Green Kitchen Stories


Friday, November 7, 2014

Steamed Dal Dumplings

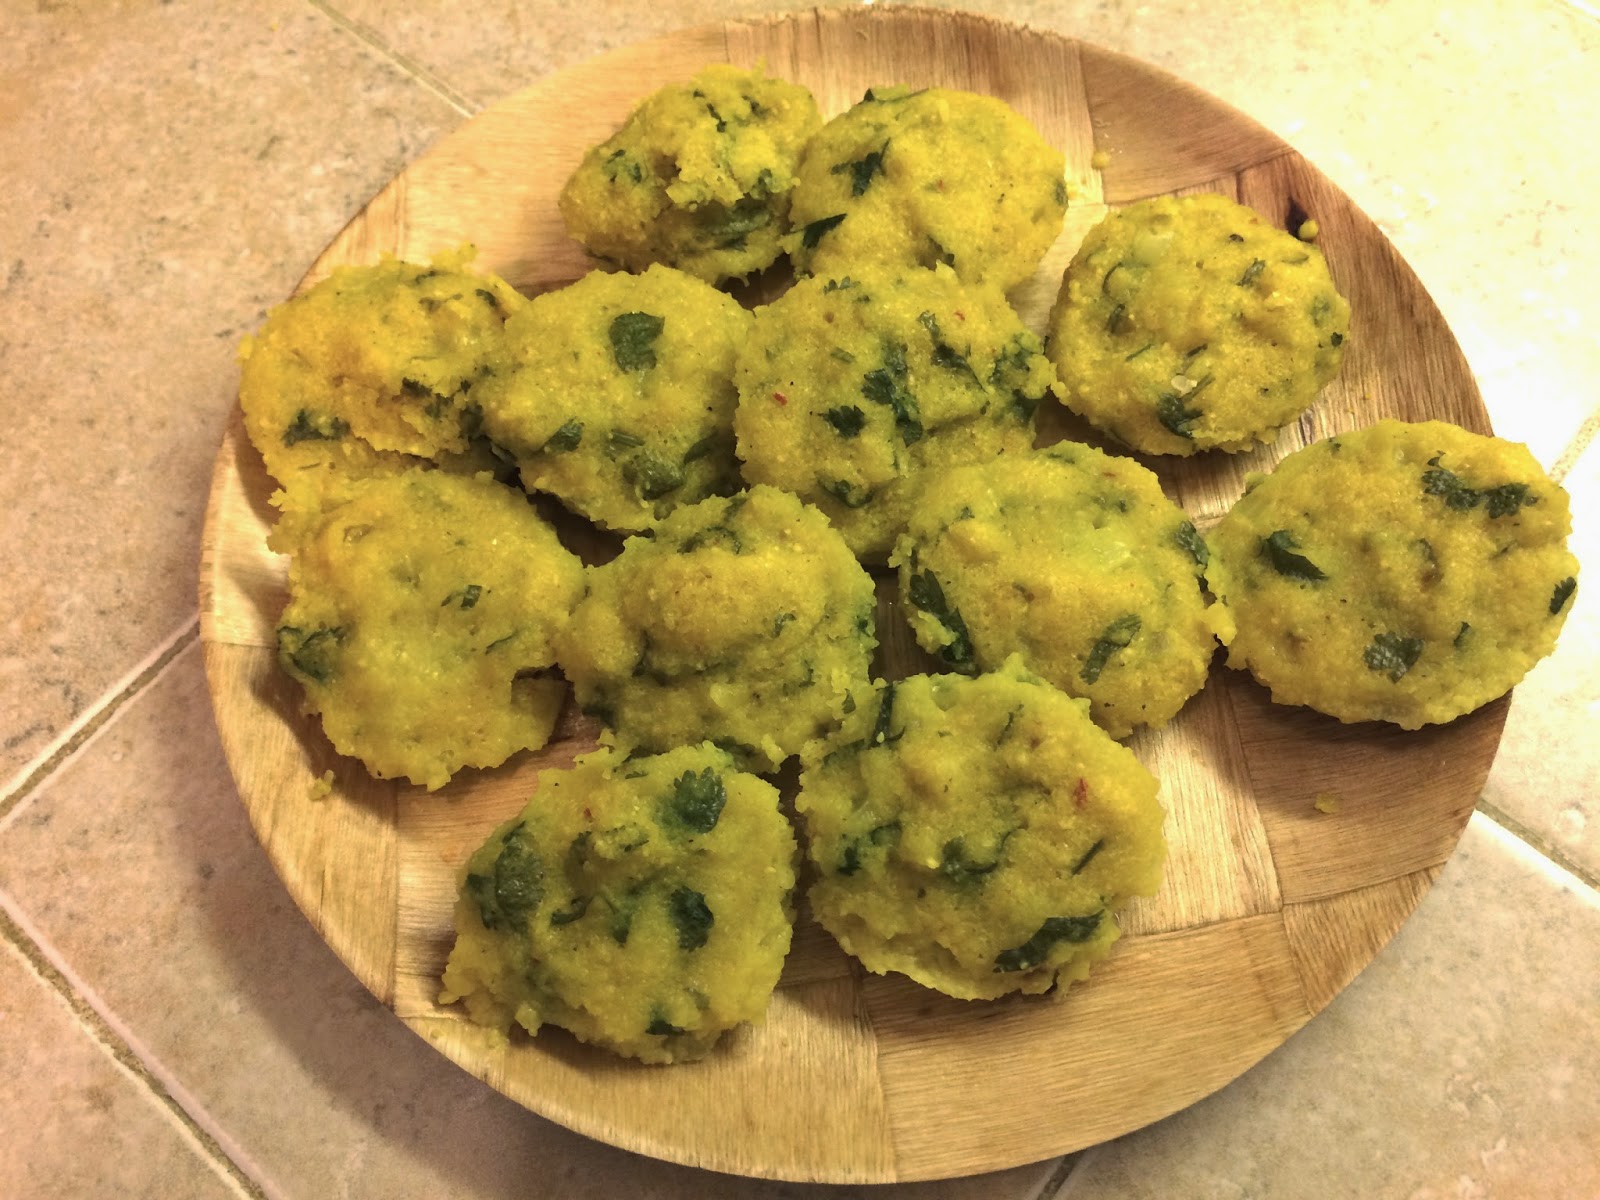
These dal dumplings make a healthy snack as they don't involve any frying - we even eat it at times for lunch. I use my idli mould to make them - it makes good sized portions and are easy to steam. I usually serve them with the tomato garlic chutney (the cooked version). They are called bhapouri in Hindi and are apparently a very common household snack in a few regions - I had personally not heard of them until I came across this recipe:
Ingredients:
Should make about 4-5 snack portions for 2 people
For the Paste:
  • 1 cup Dhuli Masoor (soaked overnight or a min of 4 hours)
  • 2 Tsp cumin seeds
  • 1 inch ginger - minced/grated
  • 3 garlic cloves (use more if they are small in size like in India)
  • 1-2 dry whole red chillies as per taste
  • 1 tsp turmeric powder
Add to the Dal Paste:
  • 1 cup onions -diced
  • handful of chopped cilantro leaves

Process:
  • Blend all the first six ingredients in the food processor to make a thick paste - I don't usually add any water - but if you feel the need then add few tbsp of water. Keep the paste slightly coarse.
  • Add the chopped onions and cilatro to the dal mixture.
  • Fill the idli maker with the paste and steam for about 10 minutes on medium flame - the cooked dumplings look dull yellow in color - test if fully cooked by sticking a toothpick in it - if it comes out clean then the batch is done.
  • You could also store the extra paste in the fridge and make a fresh batch anytime you want in about half the time.
  • The dumplings themselves stay well in the fridge for 3-4 days.
  • You could try making these with some other dals as well - I haven't tried it yet- let me know if any of you tries any other dal.

Thursday, October 30, 2014

Nepali Style Aloo Chat

This is a very simple and quick recipe (if you can call it that) and is perfect for a weekend afternoon tea and gossip session.  So here it goes:

  • In 1tbsp of sesame oil add lots of green chilli (slit length wise)
  • Add haldi and salt and then add boiled aloo cubes.
  • Dry roast sesame seeds on the side and crush them coarsely (the crushing is optional)
  • Then add sesame seeds and lots of lemon juice.
  • Done!

Chivra

Ingredients:
  • 1-2 tbsp mustard oil or any other oil.
  • 1 tbsp cumin seeds
  • 1tbsp of finely chopped chilies
  • handful of curry patta
  • 2 cups of dry poha (I used brown rice poha)
  • 1 cup each of roasted chickpeas and peanuts
  • Pinch of Amchoor
Process:
  • Heat the mustard and add cumin seeds to it, wait till they splutter and then add the green chillies
  • Within a few seconds add a handful of chopped curry patta and keep stirring the mix till the curry patta starts getting dry . 
  • Add about 2 cups of dry poha(chivra) and keep stirring the dry ingredients constantly on a medium low flame. The poha will get slightly popped up after sometime. The popping up of the poha will be visible and they need to be constantly turned up so all of the tiny grains get popped up. (Note:This is the trick to roast poha in very low oil or ghee) 
  • Take off heat when all of them have popped up and mix salt , pepper and red chilly powder to taste and a bit of amchoor powder too.
  • Add a cup each of roasted peanuts and roasted chickpeas. Keep in an airtight container.
  • NOTE: I used store bought roasted unsalted peanuts but I roasted the chole at home.

How to roast Chickpeas:

  • Soak the Chickpeas overnight. 
  • Drain and rinse the chickpeas well. Now place it covered with fresh water (enough water to cover it) 
  • Cook for 3 whistles or about 8-9 minutes. I wait another 6-7 minutes for it depressurize but you can do a show it under cold water for a quick release too. Drain the chickpeas well. Make sure the chickpeas are dry. You can also use paper towel to dry it out.
  • Note:You can at this point heat some oil in a skillet on stove top and roast them for 1-2 minutes before moving them to the oven. Try this if you keep finding your chickpeas not crunchy enough. 
  • Preheat Oven to 350F. To the drained chickpeas add the seasoning of your choice. You can add them after they are roasted too. 
  • Line a baking sheet with parchment and spread out the chickpeas on it.
    Bake for about 45 minutes or until crisp and golden. Make sure to shake the tray intermittently to redistribute the Chickpeas. 
  • You can even use these roasted chickpeas as a stand alone snack - just add some salt and chili powder.

Kale Chips

Simplest Version
You'll need:
  • A bunch of kale (either curly or lacinato—they’re both good, but I have only used dinosaur Kale), center stems removed, washed and dried thoroughly 
  • About 1 tbsp. sesame oil or olive oil ( I use Olive oil)
  • Salt & Pepper to taste


What to do: 
  • Preheat your oven to 350F. 
  • Tear the kale into large pieces and place them in a bowl. Make sure you remove the stems, otherwise the chips would turn out to be chewy and maybe bitter too. I remove the stems very quickly by grabbing the base of the stem with one hand and pushing outwards along the stem to slide off the leaves. Works like a charm! (NOTE: I have to stress how important it is that your kale is dry. Otherwise, the chips will turn out soggy.
  • Next, add the oil, salt and pepper and toss it all together with your hands. (You want each piece to be glistening, but not so much that any of the oil or seasoning pools at the bottom of the bowl. You can also taste a piece at this point. It shouldn’t be too salty, because the taste will condense in the final chip.)
  • On 1 or 2 baking sheets (with or without parchment paper), lay the pieces out flat. 
  • Bake 12-15 minutes. (Note: The timing would vary a bit with different types of oven -You may need to experiment a little with the timing to get it right.)


Bonus tips
  • Avoid adding liquids (such as vinegars or hot sauces) pre-baking as liquids can result in soggy chips. It’s best to add a light spritz of liquid seasoning after they’ve been baked, if at all. Also, if your oven has one, feel free to try out the dehydrator or convection setting.
  • Don’t skip the oil, but don’t drench it in oil either: I like to use ½ tablespoon of oil per baking sheet of kale chips. You could 'massage' the oil into the leaves to ensure all the nooks and crannies are coated. Oil also helps the spices stick to the leaves - but its not a must do step
  • Spread the kale into a single layer on the baking sheet - do not overcrowd the sheet
  • I’ve found that waiting just 3 minutes allows the kale chips to crisp up even more once they are out of the oven.

Spicy Version:
Add a bit of these spices to make your chips super masaledar
  •  1 teaspoon garlic powder
  • 3/4 teaspoon chili powder
  • 1/2 teaspoon onion powder
  • 1/2 teaspoon smoked paprika
I make the simplest version of these most of the times and the bowl gets empty before my oven is even cold. So I would suggest making a big batch of these chips especially if you have kids. There are a couple of other fancier versions also available on the web with almond butter and other additions, which I have not yet tried but will update sometime soon.

Tuesday, October 28, 2014

RAW CACAO TRUFFLES

Cacao vs Cocoa - is there a difference? Which one is better?

The cacao fruit tree, also known as Theobroma Cacao, produces cacao pods which are cracked open to release cacao beans.  Raw cacao is made by cold-pressing unroasted cocoa beans. The process keeps the living enzymes in the cocoa and removes the fat (cacao butter). Cacao butter is the fattiest part of the fruit and makes up the outer lining of the inside of a single cacao bean. It is white in color and has a rich, buttery texture that resembles white chocolate in taste and appearance. Raw cacao powder contains more than 300 different chemical compounds and nearly four times the antioxidant power of your average dark chocolate - more than 20 times than that of blueberries. Cacao has the highest content of magnesium.

Cocoa looks the same but it’s not. Cocoa powder is raw cacao that’s been roasted at high temperatures. Sadly, roasting changes the molecular structure of the cocoa bean, reducing the enzyme content and lowering the overall nutritional value.

You can use cocoa powder and cacao powder interchangeably in baking, smoothies etc. The best powder is dark brown and will taste bitter. You can make your own hot beverage by mixing the powder with hot water or milk. Some research has found that mixing dairy with cacao inhibits the absorption of the nutrients. So to get the most health benefits from your cup of cacao, try using a milk substitute such as coconut milk or almond milk. Or you can try using cacao powder in tasty treats like this one: 

INGREDIENTS
  • 2 cups raw almonds
  • 3/4 cup raw cacao powder
  • 6 dates, pitted
  • 1/2 cup raisins
  • 1 tbsp coconut oil
  • pinch of sea salt
  • 3 Tbsp – 1/4 cup cold, filtered water
  • 1 cup shredded, dried organic unsweetened coconut flakes (optional)
  • Variations: Add some cayenne to spice it up, cinnamon, or whatever flavor you would like to try (I did not add any)
PREPARATION

  1. Grind the almonds in a food processor to desired consistency (fine grind or a little chunkier for a crunch – you’re call), then add the cacao, dates, raisins, coconut oil and a pinch of sea salt. (I used the coffee grinder)
  2. Once everything is blended well, add the water (starting with smallest amount and build if need be) to make the mixture moist. (I had to use just half of the 1/4th cup)
  3. Empty mixture into a bowl and get ready to ROLL! Take a small amount of the mixture, and roll balls a touch smaller than that of a golf ball between your palms. Send LOVE into them! If you want to, dip each ball into a smaller bowl of the coconut flakes and cover thoroughly by rolling and pressing to cover each ball evenly. That’s it!
  4. Keep in fridge to help the truffles harden for at least two hours till ready to serve. Of course, I have to sample a few before going into the fridge. This recipe yields around 25-35 truffles depending on size you roll balls into.
Noops Notes:
  • The truffles turned about to be very mildly sweet which I like but if you want you can increase the amount of raisins and dates by a little to make them sweeter. 
  • I tried to roll the balls in coconut but maybe I used very little oil or maybe my coconut flakes were too big but I had difficulty getting them to stick - nevertheless they tasted super good and are my favorite snack with my Rooibos Tea


Pic: My Own
Recipe Source: Onegreenplanet

Saturday, October 25, 2014

Baked Sweet Potato Chips

Baked Sweet Potato Chips
These chips are quick, easy and good for scooping up lots of hummus or any dipping sauce. The best part is that you can have them even after they are cold - I store them in an air tight container and they stay good for the next 2-3 days (that's the maximum I have kept them)
  • 2 medium-sized sweet potatoes
  • 2 tbsp olive oil
  • 1 tsp salt
Process
  • Preheat the oven to 400°F (200°C) and cover 2 baking sheets with parchment paper. 
  • Cut the sweet potatoes in 1/8 inch / 4 mm thin slices. 
  • Place the slices in a bowl, drizzle with oil and salt and toss until they are coated. 
  • Spread them out on the baking sheets and bake for about 25 minutes or until crispy, flip them half way through. 
Recipe Source: Green Kitchen Stories


Thursday, October 23, 2014

Quick Chickpea Tikki

Serving Size: about 12 small tikkis
  • A cup of boiled chickpeas is mashed with a fork (make sure the chole are cooked well otherwise the tikki will not bind together)
  • along with 1/4 cup finely diced onions and
  • 1/4 cup chopped almonds added
  • sesame seeds
  • 1/3 cup chopped parsley/cilantro

The mixture is seasoned with salt, pepper and paprika or chilly powder and a hint of anardana (dry pomegranate) powder. I added 1/2 cup of popped amaranth and mixed the dough like mixture well, shaped small patties and shallow fried on a skillet.


These croquettes can be served with any dip or chutney you like. I loved the way chopped almonds taste in this chickpeas croquettes.


Recipe Source: Healthfooddesivideshi

Wednesday, October 22, 2014

Super Simple Seeds Crackers

Recipe Source: My New Roots
Makes 2 baking sheets of crisp bread
Ingredients:
1 cup / 135g sunflower seeds
½ cup / 90g flax seeds
1/3 cup / 50g pumpkin seeds
¼ cup /40g sesame seeds
1 ½ cups / 150g rolled oats
2 Tbsp. chia seeds
4 Tbsp. psyllium seed husks or 3 Tbsp. if using psyllium husk powder (I didn't add this)
1 ½ tsp. fine grain sea salt
1 Tbsp. maple syrup (for sugar-free diets, use a pinch of stevia)
3 Tbsp. melted coconut oil or ghee
1 ½ cups / 350ml water
Baking sheet or Aluminum Foil (I used foil)

Rosemary, Garlic and Smoked Salt (I just made one batch of these)
Half batch:
2 Tbsp. chopped fresh rosemary
¼ – ½ tsp. garlic powder (depending on how strong you like it)
smoked sea salt, to taste

Fig, Anise and Black Pepper
Half batch:
3 large dried figs (approx. 70g)
1 tsp. anise seed
1 tsp. cracked black pepper

Directions:
1. In a large bowl combine all dry ingredients, stirring well. Whisk maple syrup, oil and water together in a measuring cup. Add this to the dry ingredients and mix very well until everything is completely soaked and dough becomes very thick (if the dough is too thick to stir, add one or two teaspoons of water until the dough is manageable). Divide the dough roughly in half, and set aside one half.
2. Place one half of the dough back into the bowl and add any flavouring you like. Gather into a ball and place it between two sheets of baking paper. Using a rolling pin, firmly roll out into a thin sheet. Remove top layer of baking paper and using the tip of a knife, score the dough into shapes you like (I chose large rectangles but it’s up to you). Repeat with remaining half of dough. Let sit out on the counter for at least 2 hours, or all day or overnight. (PS: I used my hands to spread out the dough and the back of a spatula to even it out - didn't feel the need for a rolling pin.)
3. Preheat oven to 350°F / 175°C. Using the baking paper, slide the dough onto a cookie sheet and bake for 20 minutes. Remove cookie sheet from oven, flip the whole cracker over (if it breaks a bit, don’t worry!) and peel the baking paper off of the back. Return to oven to bake for another 10 minutes, until fully dry, crisp, and golden around the edges. (PS: Didn't flip them and they cooked just fine)
4. Let cool completely, then break crackers along their scored lines and store in an airtight container for up to 3-4
weeks.


Noops Notes:
  • Water:  I used the exact amount of water mentioned here. The mixture will feel watery in the beginning but the oats and the seeds will quickly soak all the water.
  • DO NOT forget Grease the Pan/Foil: I had forgotten to lightly oil the foil before putting the dough which made taking out the crackers a bit difficult - although all of them were saved.