This blog is my collection of healthy recipes and other health and nutrition related information from all over the web. This is just my way of sharing all the healing goodness with my family and friends.

Tuesday, July 7, 2015

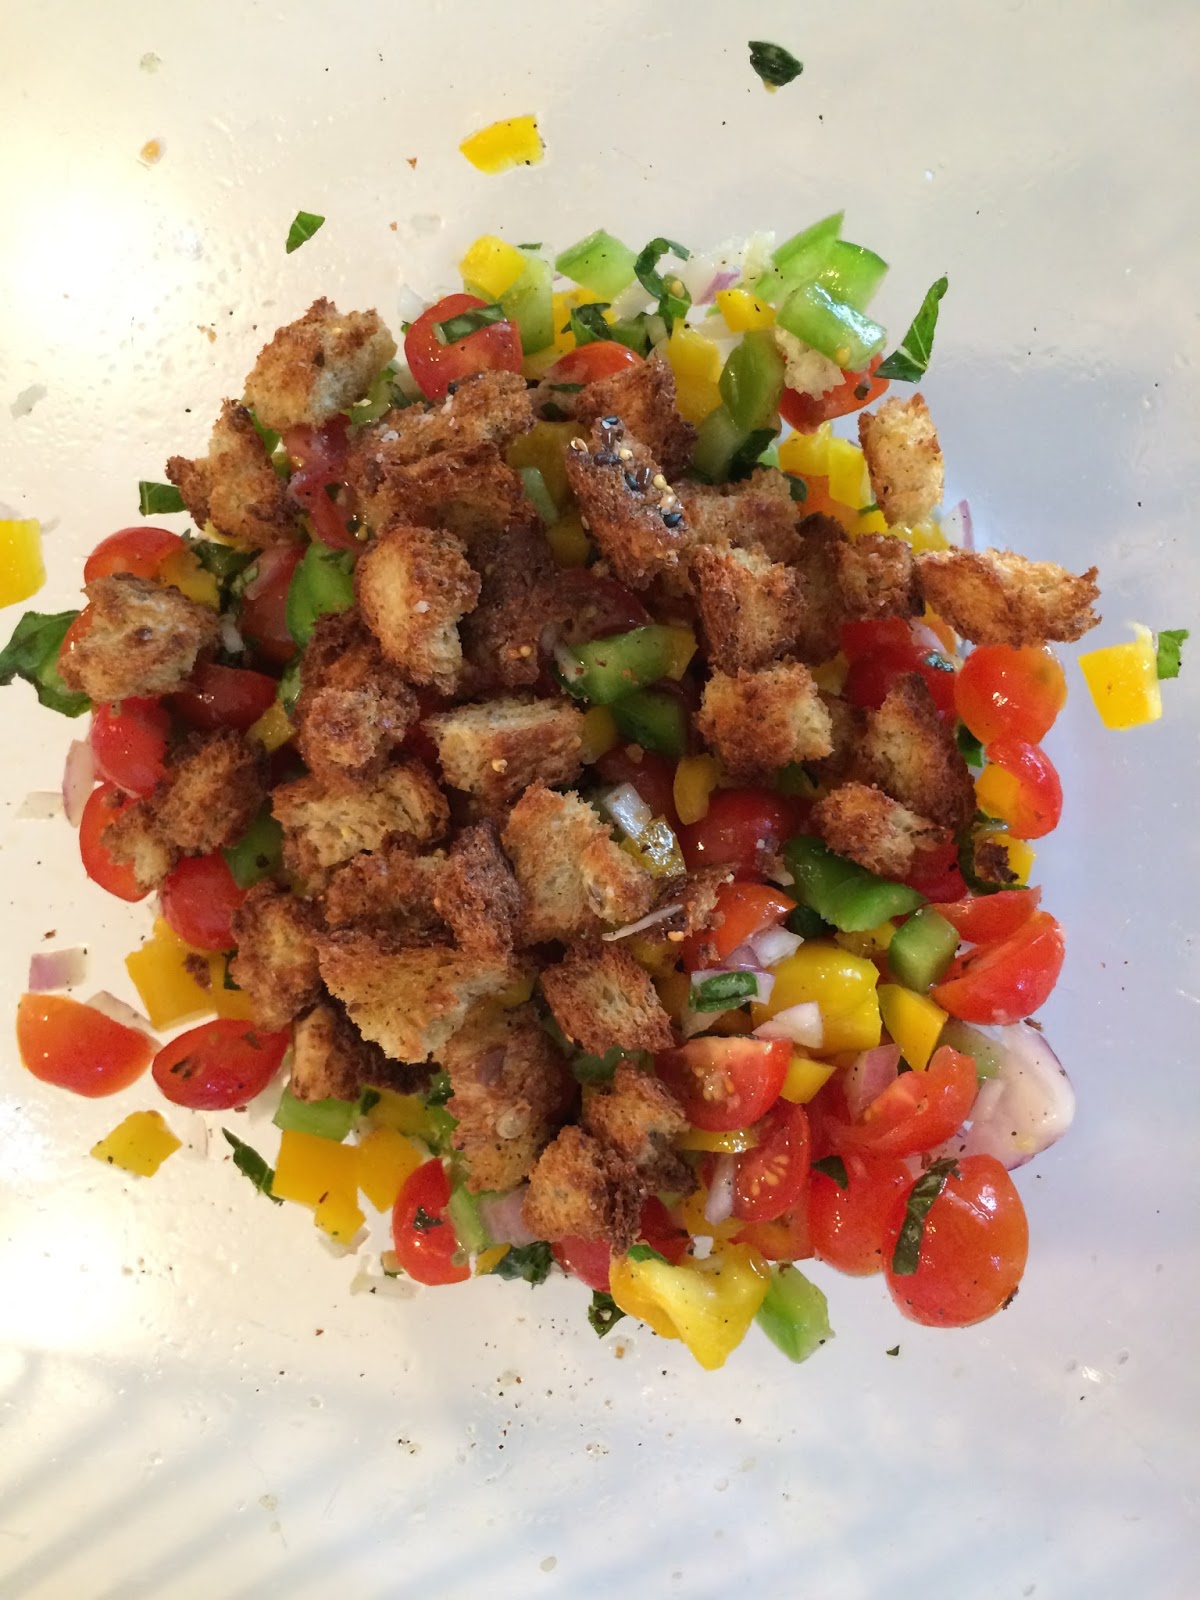
Tomato Panzanella Salad

This is one of my all time favorite salads - I am surprised that I have not posted it till now. I make it ever so often and is one of the few recipes that I remember by heart (kind-of). There are quite a few variations of the Panzanella salad out there, the one given below is broadly what I stick to based on the ingredients I have on hand.

Serves: 2 as main dish

INGREDIENTS:
Bread Croutons (homemade or store bought)
1 handful of salad leaves (optional)
2-3 handful of cherry tomatoes - halved
1/2 red onion
1 small green pepper
1 small red pepper
1 garlic clove - minced
2 tbsp - fresh basil leaves - chiffonade
2 tbsp Vinegar (Rice or Apple Cider)
2 tbsp Olive oil + 1 tbsp for making croutons
Salt
Pepper

NOTES:
- For making the croutons, you can use any bread - I used the multi-grain bread that I usually have on hand.
- A classic panzanella does not include salad leaves, but I tend to add a fistful to add a bit of crunch.

PROCESS:
  1. If you are planning to make the croutons at home - its a pretty simple process. Tear 2 slices of bread into bite sized pieces. (You can use any bread -I used the multi-grain bread that I usually have). Put them in a bowl and drizzle olive oil (1tbsp) and mix well. If you want you can sprinkle a bit of salt and pepper as well - I dont. Spread the bread pieces in a single layer on to a parchment lined baking tray and put them in the oven at 400F for about 7 minutes. 
  2. Prep the Veggies: Cut the cherry tomatoes into half and dice the onion. Dice the peppers and mince the garlic clove. Chop basil leaves.
  3. Mix all the veggies and basil in a bowl. Top with the freshly made bread crumbs. 
  4. Drizzle the oil and vinegar. Add salt and pepper to taste.
  5. Let the salad for about 10-15minutes for the flavors to develop. You can eat it even later but be careful to add the bread just before eating otherwise it would become soggy.


Friday, June 26, 2015

Rainbow Chard & Strawberry Salad

This is a salad that I have been making for quite some time. It makes for a really refreshing summer meal that has nice sweet and sour notes. I really don't follow any strict measurements and just mix the ingredients in the quantity that looks good in my salad bowl. I made this salad again yesterday but forgot to take pictures - will whip it up again soon and post some photos. Till then here is how to go about it:

INGREDIENTS

  • 5-6 leaves and stalks of rainbow chard - finely chopped (can you any kind of chard)
  • 1 handful of strawberries - sliced
  • 1 handful of cherry tomatoes - halved
  • 1 tbsp honey
  • 2 tbsp olive oil
  • juice of 1/2 lime
  • Lightly Roasted walnuts (optional)
  • Goat cheese (optional)
  • salt & pepper
PROCESS
  1. Cut the chard into thin slices.
  2. Add the chopped strawberries and tomatoes
  3. Dressing: Mix the olive oil+honey+lime juice and salt pepper in a small bowl
  4. Drizzle the dressing on the salad - if need be mix in additional honey or lime juice depending how sweet or sour you want it to be
  5. Toast the walnuts on a low flame till they are fragrant.
  6. Garnish with roasted walnuts and goat cheese

Thursday, June 18, 2015

Thai Style Green Lentils with Avocado Relish


It has been a while, I posted a new recipe here. The past few weeks went by in a blink of an eye. Anyways, I am back in the kitchen making good old favorites along with trying my hand at a few new concoctions. This dal was one such meal - its was pretty easy to put together provided you had all the ingredients on hand. It turned out to be a simple healthy meal with a mild thai flavor.

INGREDIENTS:
  • 1 cup French (Puy Lentils)
  • 1-2 Tbsp coconut oil
  • 1 Tbsp green thai curry spice mix (optional)
  • 2-3 one inch lemongrass stalk (optional)
  • 1  tsp cumin seeds
  • 2 tsp coriander powder
  • 1 tsp turmeric powder
  • 1/4  tsp chili powder (cayenne powder)
  • 2 large garlic cloves - minced
  • 1 inch ginger piece - minced/grated
  • 1 small tomato - pureed
  • 1 can coconut milk (full fat)
  • Juice from 1/2 a Lime
  • Handful of fresh cilantro - chopped
  • salt and black pepper to taste
NOTES: 
- You can use any type of whole lentils - Sabut Urad (Black Beluga) would work very well here.
- The thai seasonings such a lemongrass and green curry spice add a wonderful flavor to the dish but you can definitely make it without them. It might not be as aromatic but would still be pretty good.
- I don't hate/avoid fats especially plant based fats and that is why I always use full fat coconut milk - if you feel the need you could swap it for a low fat version.
- My dal turned out to be very dark - blackish in color because of the cast iron pot that I had used. If you make it in a stainless steel pot, yours might have a yellowish tinge to it.

PROCESS:
  1. Soak the lentils for at least 3-4 hours and then pressure cook them with about 3 cups of water. If you do not soak the dal - you might end up cooking a bit longer. If you do not have ot want to use a pressure cooker,  you could also cook them on a low flame in a normal covered pan for about 40-60 minutes. 
  2. Heat the coconut oil in a big heavy bottomed pot - I used my cast iron dutch oven for this. Add the thai curry spice mix+lemongrass+cumin+coriander+turmeric+chili powder.  Toast them for about a minute - till get fragrant and change color.
  3. Add the minced garlic and ginger along with salt and pepper - cook for 30 secs.
  4. Add the tomato puree and let it cook for about 15-20 minutes on low flame - till the tomatoes are fully cooked and all excess water has disappeared. 
  5. Once your above tadka (spice mix) is done - mix in the cooked lentils to it. (Alternatively, you could also add the soaked but uncooked lentils at this point and let the cook with the spice mix for about 40 minutes.)
  6. Once the lentils are cooked - add the coconut milk, lime juice and fresh cilantro.
  7. Adjust the seasonings and serve it in bowls  - top the bowls of dal with avocado relish (Recipe Below). You could eat the dal with a side of rice or any other grain, we however loved it just as it is.

Avocado Relish
INGREDIENTS
  • 1 large avocado diced
  • 2 green onions - chopped
  • Juice of 1 lime
  • 1 Tbsp olive oil
  • 1/2 tsp honey
  • 1/2 tsp red chili powder or chopped fresh green chili
  • 1/4 cup fresh cilantro - chopped
PROCESS
  1. In a mixing bowl - add the chopped avocado and green onions. 
  2. Whisk the honey, oil, lime juice and chili powder separately and add it to the mixing bowl.
  3. Sprinkle with chopped cilantro.

Wednesday, June 3, 2015

Cacao v/s Cocoa


I use cacao powder in all my recipes that ask for chocolate or cocoa. This is one of my favorite cookie recipes. I had been thinking of writing  a brief on the basic difference b/w the two and their respective benefits.

The basic difference between cacao and cocoa is that Cacao is raw and minimally processed. It is made by cold-pressing unroasted cacao beans. The process keeps the living enzymes and removes the fat (cacao butter). It is considered to be the biggest source of antioxidants and magnesium. There are three natural by-products of the cacao tree and I use and love all three of them - Cacao butter, powder and nibs.
The Cacao fruit tree produces cacao pods which contain the cacao beans. The outer lining of the inside of the cacao bean is the fattiest part of the fruit which is buttery in texture and resembles white chocolate in taste and looks - this is called cacao butter (I make an awesome cacao butter moisturizer at home- will post the recipe soon).
After removing the cacao butter, the bean is then used to make raw cacao powder. You can use this powder in baking, smoothies, milk shakes etc.
And cacao nibs are simply raw cacao bins crushed to bits.

Cocoa on the other hand is the heated form of cacao that is more popular and commercially more easily available. Cocoa despite going through higher temperatures of heat during its processing still manages to retain surprising high level of antioxidants. If you are buying cocoa choose a version with no added sugars, milk fats and oils.

Chocolate bar - When buying chocolate choose the one with really high cocoa content - at least 60-70% or higher. The higher the cocoa content the darker the chocolate and it also means that it has less amount of other not-so-healthy ingredients such as sugars, processed oils, flavorings etc.

A high quality chocolate should contain just about 3 to 4 ingredients: chocolate, cocoa butter/ cocoa mass, and/or cocoa liquor, plus sugar. Anything beyond that is all crap such as milk or milk products, any oil, soya lecithin, emulsifiers, ‘natural flavour’, or preservatives.
Finding out how your chocolate was processed might be a super tedious process but it will tell you a lot about how healthy your chocolate actually is - Drying cacao beans in the sun instead of roasting them preserves many of the chocolate’s delicate nutrients. Make sure that their processing temperature is not over 110°F. Avoid chocolate whose processing includes “Dutching”, an alkalization method that actually removes the polyphenols, which add the characteristic bitter flavor to the finished product.

I buy my cacao products from the bulk section of my health food store. If I am correct, Whole foods carry Nutiva brand cacao and cocoa powder which are organic although I do not know much about how they process it.

Tuesday, June 2, 2015

Cacao & Peanut Butter Cookies

This recipe originally was made with Cocoa powder and dark chocolate bits - I made a few changes and used cacao powder and nibs as I prefer Cacao over cocoa. I personally do not find any difference between the taste of the two but that's probably because I am used to it.
They did turn out to be pretty tasty - although I was not happy with the amount of sugar that went into it. Though in my 2nd try I replaced regular sugar with coconut sugar and the cookies tasted just as good.
The best part about these cookies is that you can make them completely gluten free (current version) or vegan (use nut milk) or nut free (use seed butter) depending on your personal preference.

Makes about 12 large cookies
Ingredients:
WET INGREDIENTS:
  • 1 tablespoon ground flax mixed with 3 tablespoons water
  • 1/4 cup virgin coconut oil (do not melt)
  • 1/4 cup peanut butter (Can replace with almond or sunflower seed butter)
  • 1/3 cup sucanat
  • 1/3 cup coconut sugar (can use normal sugar)
  • 1 teaspoon vanilla bean or vanilla extract
DRY INGREDIENTS:
  • 1/2 teaspoon baking soda
  • 1/2 teaspoon baking powder
  • 1/2 teaspoon fine grain sea salt (optional)
  • 3 tablespoons cacao powder (can use cocoa as well)
  • 1.5 cups rolled oats, processed into flour (or 1.5 cups oat flour)
  • 3-4 teaspoons milk -only if needed to moisten batter 
  • handful of cacao nibs (can use chocolate chips)
Directions:
  1. Preheat oven to 350F and line a large baking sheet with parchment paper. 
  2. In a large mixing bowl, mix together the flax and water and set aside for a few minutes so it can thicken up. Whisk the flax egg again once thickened.
  3. Add the rest of the wet ingredients into the bowl with the flax egg (coconut oil, peanut butter, sucanat, cane sugar, and vanilla). With a hand-held electric mixer, beat the ingredients until combined and smooth.
  4. Now, beat in the dry ingredients, one by one, as you go down the ingredient list (baking soda, baking powder, salt, cacao powder, oat flour). If your dough is a bit dry, add a few tea-spoons of milk and beat the mixture again. The dough should be moist enough to form balls without cracking, but not super sticky.
  5. Beat the cacao nibs into the batter or simply stir by hand.
  6. Shape balls of dough (about the size of a golf ball or 2 heaping tablespoons) and place on the baking sheet 2-3 inches apart. Gently press down on each ball with your hand to form a disc (it should be 1/2-inch thick or so).
  7. Bake for about 12-13 minutes (I baked for 13 mins) until the cookies are spread out nicely.
  8. Cool cookies on the baking sheet for 7 minutes or so and then transfer to a cooling rack for another 10-15 minutes.


Sunday, May 10, 2015

Pear Arugula Salad


Serves 2

INGREDIENTS
1 pear - chopped
few handfuls of arugula leaves
1 cup cooked chickpeas
1/2 cucumber - diced
1 thinly sliced fennel (optional)
1/4 cup pine nuts - toasted
hemp seeds to garnish
1/2 cup goat cheese or feta (optional but recommended)

Dressing
3 tbsp Olive Oil
juice 1 lemon
1 tbsp white wine vinegar (or any other vinegar)
1 tsp mustard sauce (dijon or any other kind)
2 tbsp chopped green onions
salt & pepper

PROCESS:

  1. Mix all the dressing ingredients in a bowl.
  2. Pour some of dressing on the cooked chickpeas and let them sit for a few minutes - marinating the chickpeas in dressing makes them more flavorful but if you are short on time you can totally skip this step.
  3. Put the pine nuts in a small pan and toast them on a very low flame.
  4. Mix in all the salad ingredients together - arugula+pear+cucumber+fennel+chickpeas and put the rest of the dressing on it and mix well.
  5. Garnish with lightly toasted pine nuts, hemp seeds and a little bit of goat cheese. 

Saturday, May 9, 2015

Baked Potato Wedges

I am a big fan of healthier version of traditional recipes. These baked potato wedges are one such dish. Just by replacing the deep frying step with baking makes it infinitely healthier. And the best part is that they taste just as good. Trust me, give me them a try and you will be a fan forever:

INGREDIENTS:
5-6 medium/large golden potatoes
coconut oil to sprinkle
salt to taste
few pinches of red chilli powder/paprika (optional)

PROCESS:
  1. Preheat the oven to 400F 
  2. Bring a large pot of water to boil and add a teaspoon of salt to it
  3. Wash and cut the potatoes into wedges (keep the skin on)
  4. Cook potatoes in the boiling salted water for 7 minutes.  Remove form the stove and drain. Its v.imp not to let them cook for any longer as they would get overcooked and not become crispy. 
  5. Put the wedges in a mixing bowl and add the oil, salt and chili powder if using and mix well.
  6. Spread the wedges on a baking sheet and roast for about 17 mins - take them out and turn the wedges over and out them back in the oven for another 17 mins.
  7. Take them out when they turn crisp to your liking - squeeze lime juice over them or serve them any kind of sauce, with burgers or just enjoy them as it is.


Monday, April 27, 2015

Raw Raspeberry & Cashew Cheesecake

Let me preface this by saying, that this is the easiest and quickest recipe that I have ever tried. Once you have all the ingredients (which is a pretty short list in itself), the actual making is really a 'piece of cake' (sorry, couldn't resist). Ok - it's not exactly a traditional cake but more of an ice-cream cake but that's what I loved most about it. And best of all its completely raw. 
Though it is made up of all healthy and nutritious ingredients, some of you might not like the amount of cashews because of their high fat content (as a friend pointed out yesterday) that goes into it - all I can say to that is that unless you are going to eat the whole cake by yourself - you should be good.

INGREDIENTS
Crust
1/2 cup raw walnuts (can use pecans or almonds)
1/2 cup medjool dates - pitted
1/4 tsp salt

Filling
1½ cups raw cashews, soaked for at least 5 hours, overnight is best
Juice of 1½ lemons (can go up to 2 lemons depending on how sour you want it to be)
1/3 cup raw honey (or agave syrup)
1/3 cup coconut oil - melted
1 tsp vanilla extract (or seeds of 1 vanilla bean)
1 cup raspberries

NOTES:
- I used a 7"springform cake pan, but the original recipe creator had suggested layering any cake pan with round edges with a seran wrap. I did not want risk it but on an afterthought I guess, it could have worked decently well. In any case use a small 7" or 8" inch pan as this is a small sized cake.

PROCESS

  1. Put the nuts (walnuts or whichever one you are using) and dates along with the salt in a food processor and pulse until they are chopped into small pieces. For a finer crust - you might have to process them longer than for a chunky one. To test if your mixture is of the right consistency, take a spoonful and roll it in your hand - if it binds well together then it means its done. 
  2. Scoop out the crust mixture and spread it in the cake pan. Press firmly with your hands making sure that the edges are well packed and that it forms an even base.
  3. Warm the coconut oil and honey - I prefer not heat honey on a direct flame - so you could melt the honey by placing the jar in a pan of boiling water and melt the oil separately and then mix the two.
  4. Place all the filling ingredients i.e soaked cashews, lemon juice, honey+coconut oil and vanilla extract in a food processor. Use the most powerful machine that you have - I used my Cuisineart food processor and it did a great job. At this point I would suggest testing out the sourness of the mixture - you can start with juice of 1 lemon and then add as you go till its sour to your preference.
  5. Pour the 2/3 of this mixture in the cake pan (no need measure this exactly - a rough gesstimate will do) - spread it evenly with a spatula.
  6. Now add the raspberries to the remaining cashew mix in the processor and blend them till they are smooth. Pour this in the cake pan as your third and final layer and smooth it out.
  7. Place it in the freezer until solid. It took me about 2-3 hours. To serve get it out of the freezer and place it in the fridge for about 30 minutes. 
  8. Run a sharp knife under hot water to easily cut the slices - although I did not feel the need for this step.


 Recipe Source: My New Roots

Friday, April 24, 2015

Kala Chana & Chickpea Green Medley


For the longest time, I used chickpeas only to make the traditional Indian chole curry but since that time I have started exploring different cuisines, I have used chole/chickpeas a lot more in my cooking especially in salads etc. This salad is one such example, the original recipe calls for chickpeas but I had boiled kaale chane (bengal gram) in the fridge which I added as well. They both tasted good and I would probably make it next time with just kaale chane. Let me also tell you that this salad tastes much better than it looks, so don't hesitate to try it out.

Serves 2
INGREDIENTS

  • 2 cups cooked chickpeas/ kaale chane (3/4th cup uncooked)
  • 4-5 cups chopped spinach
  • 1 cup cilantro/ parsley- chopped ( I used cilantro)
  • 1/2 red onion - diced
Dressing:

  • 1/2 cup lime juice
  • 1 garlic clove minced
  • 1tsp ground cumin
  • 1/2 tsp maple syrup
  • 1 tbsp olive oil
  • salt and pepper to taste
PROCESS:
  1. Wash the spinach and cilantro and put in a food processor and chop it until its super small
  2. Put the chickpeas in a big mixing bowl and add the spinach-cilantro mix to it.
  3. Make the dressing by mixing all the ingredients in a small bowl
  4. Pour the dressing over the chickpea and greens mixture.
  5. Ideally, let it sit for 10-15 mins at least to let the flavors develop


Tuesday, April 21, 2015

Quinoa Spinach Burger Patties


Whenever I think of burgers, the only one that comes to my mind and has me drooling is the Mc-aloo tikki at McDonalds in India. Since coming to US, I have tried burgers from a few different places including the world famous 'In & Out' one but I never found 'the one' that floated my boat - so I had basically given up on the whole burger genre of food. But now after turning into a vegetarian, I tried a couple of decent versions here in the city and was curious to replicate something similar and healthier at home
When I cam across this recipe as always I was quite doubtful about the success of these especially considering it was my first attempt at making patties of any kind. The long list of ingredients wasn't helping my confidence either but surprise surprise they turned out pretty awesome. I have already made them twice once at home and once for a friend's barbecue. Both times I went the extra mile to make some potato wedges and they were the perfect accompaniment to these yummy patties.

Makes 12 patties
INGREDIENTS

  • 1 1/2 cups cooked Quinoa 
  • 1/2 cup rolled oats ground into flour
  • 3 tbsp besan/ chickpea flour (or regular all-purpose flour)
  • 1 cup finely chopped spinach (can use Kale too)
  • 2 tbsp ground flax seeds + 6 tbsp water
  • 1/2 cup finely grated sweet potato
  • 1/4 cup finely diced sun dried tomatoes
  • 1/4 cup finely chopped fresh basil leaves
  • 2 tbsp finely diced onion
  • 1 clove garlic - minced
  • 1/4 cup sunflower seeds
  • 1 tbsp Tahini paste - runny (can add bit of oil to make it less firm)
  • 1 1/2 tsp oregano flakes
  • 1 1/2 tsp white wine vinegar
  • 1/2 tsp salt
  • red pepper flakes to taste

NOTES:
  • Its very important that you chop all the veggies very small - otherwise they would not bind properly.
  • You can use oil soaked sun-dried tomatoes. I used the non-oily ones, but make sure to soak them in warm water for about 30 mins before chopping

PROCESS:
  1. Preheat the oven to 400F
  2. Mix the flax seed powder in the water in a small bowl and set it aside for about 5 mins - till it thickens
  3. Chops the veggies - spinach + sweet potato+ onion+garlic
  4. Take a large mixing bowl and mix in all the ingredients - wet & dry. 
  5. Mix them well and use your hands to form a dough
  6. Wet your hands to roll the mixture into patties - you will use about 1/4th cup mixture for each of the cakes.
  7. Place them on a baking sheet lined with parchment paper and put it in the oven.
  8. Bake for about 15 mins, then take them out and flip them on the other side and bake them again for about 8-10 mins till they turn golden brown.
  9. Cool for 10 mins and serve.
  10. Serving Suggestion:  I placed them on a multi-grain bun along with a slice of tomato, onion and and some ketchup and mustard sauce. I also added a few slices of avocado and salad leaves. Serve with home made fries (Recipe coming up soon


Recipe Source: Oh She Glows