This blog is my collection of healthy recipes and other health and nutrition related information from all over the web. This is just my way of sharing all the healing goodness with my family and friends.

Wednesday, April 8, 2015

Tofu Manchurian

This is the easiest and the tastiest way to make tofu. I was never a big fan of tofu until I tried it this way. I learnt this recipe from a friend's husband and it has been a favorite of mine ever since. I have made it for lot of people, most of whom were not fond of Tofu and it was always a hit. So if you are a tofu novice then this is the recipe to start with. The best part about this is that you can keep the sauce thick to serve it as an appetizer or make it more like gravy to serve with rice or any other grain. And did I mention it takes no more than 20 minutes to whip this up:

Serves 2

INGREDIENTS:
  • 4-5 bunches Scallions (Green onions) - only the green part
  • 8 0z Tofu (Firm) (Brand I use)
  • 1 tbsp ginger - minced
  • 1tbsp garlic - minced
  • Salt 
  • Pepper
  • 1 tbsp olive oil
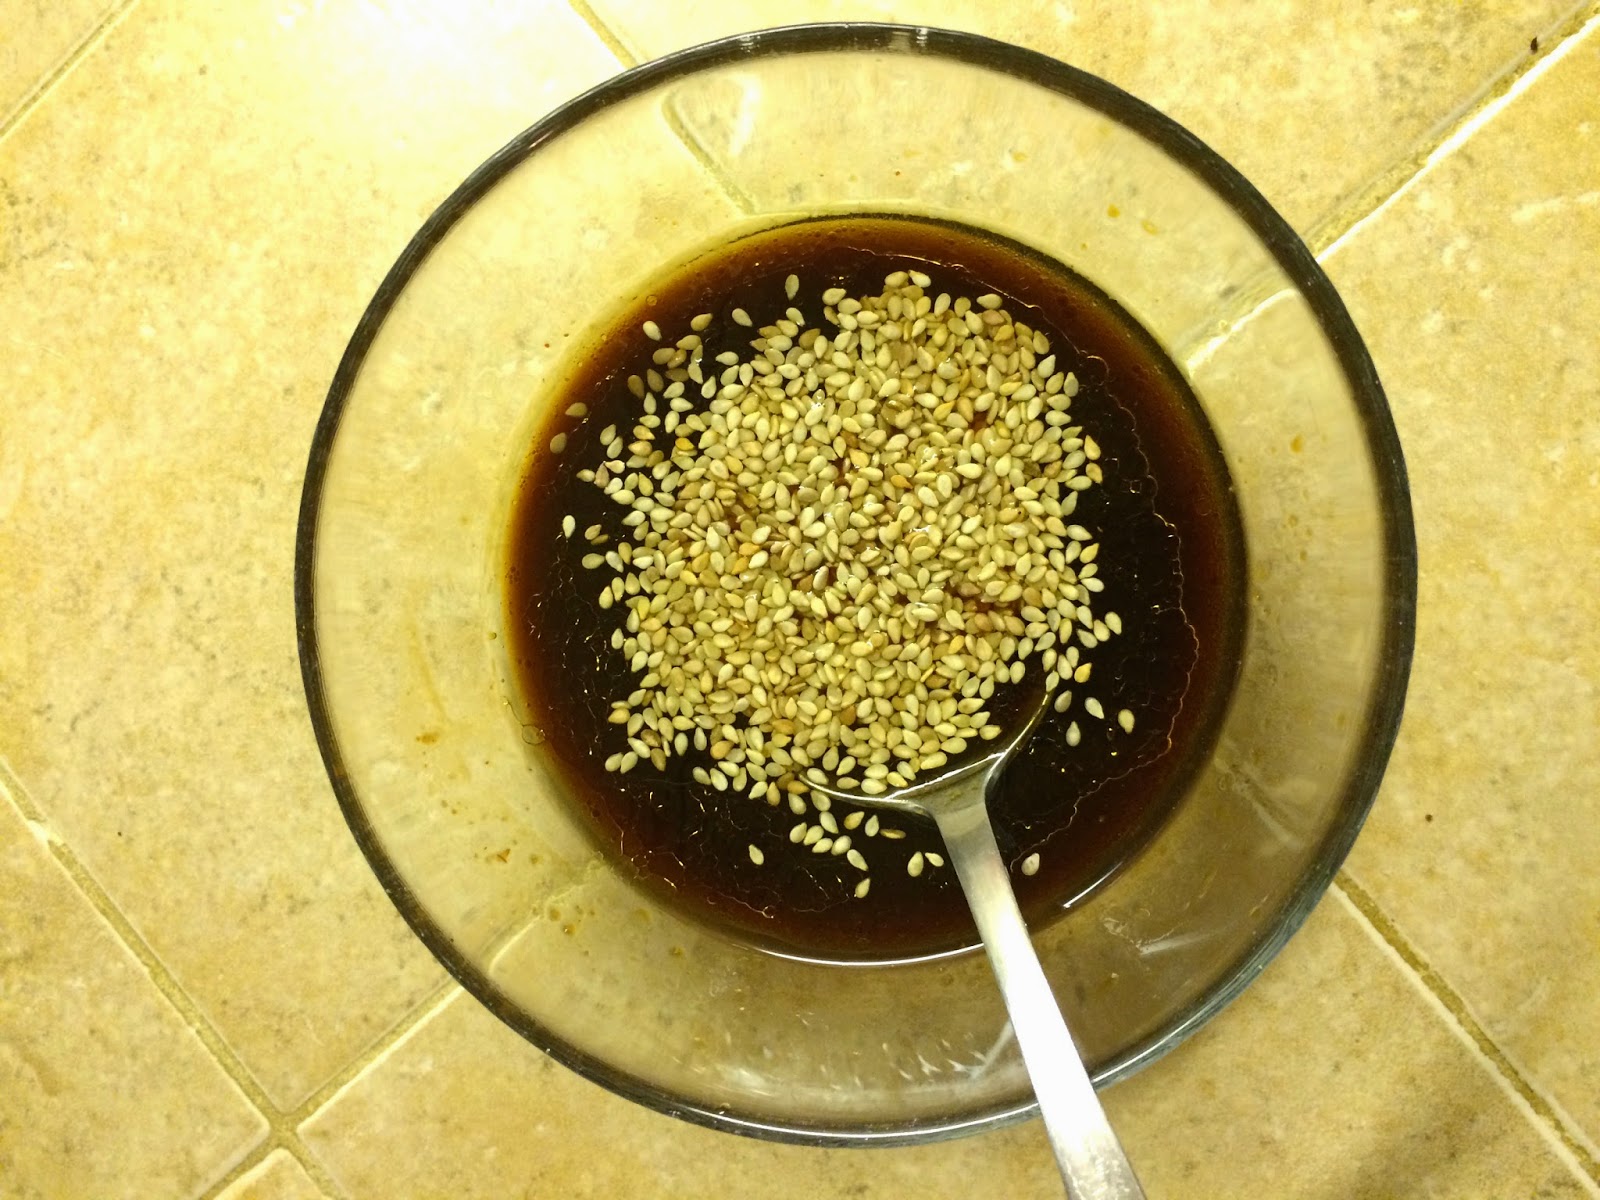
Sauce
PROCESS:
  1. Chop the green part of onions and sauté them lightly for a couple of minutes - make sure you do not overcook them especially if you are making this as an appetizer. 
  2. Chop the tofu into 1 inch pieces and keep aside.
  3. Add the minced ginger and garlic 
  4. Mix in all the ingredients of the sauce - and add it to the green onions.
  5. Add salt and pepper  to taste - while adding salt remember that the dish already has soy sauce so you might need very little additional salt.
  6. Add tofu pieces
  7. Serve as it is or on a bed of brown rice or quinoa or any other grain of your choice.


Sunday, March 22, 2015

Weekend Links


  1. If you do not live in this life right now, you will never get to the places you are imagining - A beautiful short story.
  2. This is how books should be labeled.
  3. A must read article on the effects of the use of nanoparticles on our bodies. If you are interested in more details, here is the longer version of the story.
  4. A good case for keeping your stuff in the hotel safe 
  5. Shame & Survival - A good article by Monica Lewinsky on the humiliation culture of our society and here is her recent TED talk.

Saturday, March 21, 2015

Almond Flour Biscotti

Here is the recipe of a vegan biscotti that I made a couple of weeks ago. It was my first attempt at making biscotti and it turned out to be pretty good. The process is quite simple and requires a few simple ingredients. The photos don't quite do justice to how good the actual stuff was.


INGREDIENTS
  • 1 1/2 cups almond flour
  • 1/4 cup walnuts or hazelnuts 
  • 1/4 cup dried coconut - shredded
  • 1/4 cup honey
  • 1.5 tbsp coconut oil (solid form)
  • 1/2 tsp baking powder
  • v small pinch of salt

NOTES:
  • I make my own almond flour by grinding whole almonds. 1 cup almonds plus a few more pieces will usually yield 1.5 cup almond flour. You can of course skip this step and get almond flour from the store.
  • I used walnuts here but they could very easily be substituted with any other nut such as hazelnuts or almonds.
  • You can also substitute honey for maple syrup in the same ratio.
PROCESS:
  1. Preheat the oven to 350F. 
  2. Chop the walnuts into small pieces - any big piece might end up cracking the biscotti.
  3. Combine all the dry ingredients - almond flour, chopped walnuts & dried coconut in a mixing bowl. Make sure that the almond flour has no lumps - if need be use a fork or your hands to break the lumps
  4. Now add the honey and coconut oil to this dry mixture. The important thing here is to use solid coconut oil (incase its warm and the oil is in liquid form then you can put in the freezer for a while before using)
  5. Use your hands to mix the honey and coconut oil well into the dry mixture - the mixture should turn into a soft dough.
  6. Place the dough on a parchment lined baking tray - and flatten it into a rectangle of about 10 inches long and 4 inches wide. Keep the thickness of the dough at 1 inch approx. Pat well to smoothen the dough to make sure there are no gaps or cracks.
  7. Place it in the oven and bake for 18 minutes - the edges should be brown by this time
  8. Take it out from the oven and let the biscotti cool fully - it would take at least 30 minutes. 
  9. Use a sharp knife preferably a serrated one to carefully cut the biscotti into 1 inch slices. Now slowly turn each of the slices - so that the reverse side is on top. The biscotti would be very fragile at this point so make sure you do this step very slowly to avoid breaking the slices.
  10. Put them back in the oven and reduce the temperature to 325F for an additional 10 minutes.
  11. Remove from the oven and let them fully cool and harden before serving. 
  12. You can store it at room temperature for about 10 days. Mine lasted for about 2 weeks.

Multi Grain Breakfast Cereal


I have not bought a regular breakfast cereal in about three years. We replaced the packaged sugary cereals with steel cut oats a couple of years back. Although, I really like oats but despite my experiments with new interesting toppings, of late I have started to find them too boring. That is why I was super duper excited when I came across this muli-grain cereal recipe - not only does this breakfast give you a good serving of a healthy variety of different cereals it had a lovely crunchy taste.

Serves: Makes about 18 (1/4th) cup portions
INGREDIENTS:
The ingredients give below are for making a big batch of dry multi-grain cereal.
  • 1 cup buckwheat
  • 1 cup quinoa
  • 1 cup millet
  • 1 cup amaranth
  • 1 cup barley
  • 1/2 cup sunflower seeds
  • 1/4 cup chia seeds
Mix all the ingredients together and store in a big jar.
NOTES:
  • For your first attempt, instead of premixing all the grains in a big quantity - I would suggest making one small batch by adding all the varieties in a much smaller proportion - to see if you actually like the end result or not. I made my first batch with about 2-3 tbsp of each ingredient.
  • It is very very important to soak the grains first (I will write in detail about this in my next post). If you forget to soak them the night before - try and soak them for an hour or two (or however much time you can) before cooking.
  • UPDATE: Recently my friend made good old khichdi by adding mung dal to this grain mix and it turned out to be super duper yummy. So, making khichdi with this grain mix is another great way to consume a variety of grains at other meal times.
PROCESS:
  • Pre-soak 1/4th cup of pre-mixed cereal in 1/2 cup of water and 1tbsp of vinegar and keep it overnight
  • In the morning, wash the grains thoroughly. I use a very fine mesh sieve because amaranth is a very fine grain and it just slips out of bigger sieves.
  • Add another 1/2 cup of water to the cereal and cook it on low flame for about 10-12 mins or until they are fully cooked. (If you did not soak the grains, then you might have to increase the cook time to about 20 mins)
  • Once the cereal is cooked - add milk of your choice along with fresh and dry fruit toppings.
  • Toppings Suggestions: I add whatever fresh fruit is in season - which is pear, apple and kiwi as of now. I top it with hemp, bee pollen (quite a few people are allergic to it - so start with just 1 grain and increase the amount gradually), goji and inca berries and coconut flakes.


Recipe Source: My New Roots

Friday, March 20, 2015

Triphala Honey Facepack & Scrub

As I have mentioned here in the past, I try to avoid all commercially produced beauty products. I have a few trusty home beauty remedies that work well for me. I have been using a almond flour+oil scrub for a long time. But recently I came across this Ayurvedic concoction which in my opinion does wonders for your skin. It's a mix of all the herbs and spices that you would normally have in your kitchen - each of them individually have some spectacular properties and when used together as a face mask they produce stunning results. And as always it would be best if you used all organic ingredients.

Ingredients:

  • 1 tsp triphala powder
  • 1 tsp nutmeg powder
  • 1/2 tsp turmeric powder
  • 1tbsp honey
  • few dried rose peatals (optional)
Process:
  1. Mix all the ingredients together - the honey will turn it into a thick paste - but that helps it stick well to the skin without any dripping mishaps. 
  2. You can do without rose petals - but adding them not only enhances the exfoliation factor but it gives a wonderful aroma to the whole thing
  3. Apply it dry skin for at least 15 mins and then gently scrub the mask off by using wet hands. I try and scrub it softly for 5 mins by the watch. 
  4. If you feel the need - you could also put the paste on your lips too. 
  5. Then wash it all off for radiant results.

Just to give you an idea of the consistency.

Tuesday, March 3, 2015

Soak your Nuts, Seeds, grains & Legumes


I have read this over and over that soaking your seeds, nuts and dals overnight or even for a few hours is really beneficial to health. I think most Indians are used to soaking their whole dals i.e chickpeas, kidney beans or whole mung dals but I always thought the idea behind it was to facilitate and accelerate the cooking process and if I am not wrong most Indians also grew up eating overnight soaked almonds. But besides that somehow I never thought of soaking any other of my grains or seeds. Well it turns out soaking all these 4 categories of foods - seeds, nuts, grains and legumes is super important and super good for us. Let me explain why -


  1. Ever wondered why the seeds and nuts that sit in our kitchen cabinet do not grow into plants. It is because grains, seeds and nuts all have enzyme inhibitors that prevent the seed from germinating until there are proper conditions for growth (right soil, water and sun etc). So when we eat these seeds, nuts and grains we are ingesting these enzyme inhibitors which interfere with our body's own enzymes' ability of breakdown and digest food.
  2. When we soak, we not only break down these enzyme inhibitors, we also stimulate the germination process, gearing the seeds and grains towards the growth process and these active, live seeds are much more nutritious and healthy.
  3. Soaking also helps break some of the hard to digest proteins contained in them for easy assimilation.
  4. Phtytic acid: All these 4 foods also contain something called phytic acid (an organic acid in which phosphorus is bound) in their outer covering or bran. Phytic acid binds with essential minerals like calcium, iron, magnesium, copper and especially zinc in the intestinal tract and block their absorption. (Most of these foods also contain something called Phytase - a natural enzyme present in varying degrees in all these foods which when properly activated helps breakdown phytic acid and thereby making all the nutrients more bioavailable.) Soaking allows enzymes such as Phytase and others organisms to break down and neutralize the phytic acid and thus significantly improving the nutritional content of these foods.
  5. The Proper way to Soak: The best way to soak your grains etc is in an acidic medium. What that means is that along with water you need to add a hint of acid to the soaking water (use filtered water). The best two options are - Lime Juice or Apple Cider Vinegar. For every 1 cup of grain add 1 tablespoon of acidic medium. There is not after taste of vinegar left in the soaked grains - just rinse them well in the morning and you are good to go. 
  6. You could also use dairy based acidic medium such as yogurt, kefir or buttermilk for soaking as it also provides the additional benefits of lactobacilli bacteria but the use of this medium would have to depend on the recipe that you are planning to make plus there are some conflicting views that the calcium in these mediums might effect the breakdown of phytic acid. (I personally have not tried this)
  7. Soak Time: It's ideal to soak grains 7-8 hours or overnight for best results. Some nuts like cashews, pumpkin seeds and walnuts can be soaked for even less time - about 4 hours is usually enough.
  8. Large Batches:  This is especially helpful for people with small kids - make large batches of soaked nuts and seeds that can be eaten as impromptu snacks. You can soak a big bowl of nuts and seeds of your choice overnight and then rinse them out. Place them on a baking tray and put them in the oven on the minimum available temperature - nothing more than 150F (the lesser the better) for 12-24 hours. It will take this much time for them to dry out and turn crispy again. A better alternative is to use a dehydrator but I am guessing not many people have one so an oven should suffice. Store them in an airtight container for a few months - walnuts will need refrigeration. 
  9. It's important to note that few grains such as Oats & Corn  do not contain enough Phytase (the good enzyme) to eliminate phytic acid even after soaking. Other grains such a Wheat, rye and buckwheat (non-grain) contain high levels of phytase. So it would be best to soak oats and corn for a longer period of time say 24 hours with a bit of buckwheat groats mixed in. 
Source: 1, 2

Monday, March 2, 2015

Weekend Links


  1. The power of a book: A hilarious iphone parody commercial by Ikea
  2. Easy DIY hair styles: I never try any new hair styles partially because I am lazy but also because I do not know 'how to' change or do my hair which doesn't take the whole morning. This article offers few pretty easy to try styles which even I am tempted to try out.
  3. No one could see the color blue until modern times: You must have heard about the whole hoopla surrounding the color of the dress. This article and the episode of radiolab mentioned in here gives a cool insight on how humans see color.
  4. Vitamin Myths: In the newly released book Vitamania: Our obsessive quest for nutritional perfection, the author helps dispel some of the most common myths surrounding modern nutritional guidelines. I plan to the read the book in the near future - but the interview here & here kind of gives you a gist of things. Read more here and here
  5. Harvard does a case study on this world famous Fashion Blogger: Anyone who is even remotely connected with fashion is aware of blogger The Blonde Salad and her meteoric rise in the fashion industry - she has become such a big brand that Harvard did a case study on her tracing back the steps on how she built a $8 million per year empire. 


Sunday, February 22, 2015

Weekend Links


  1. Natural Beauty Products at WholeFoods: A list of some of the better beauty products at Whole Foods. I have not used any except Dr. Bronner's soap, although I have heard people swear by Weleda's skin food. 
  2. Two new series that I have watched and liked recently Olive Kitteridge on HBO. Its a four part mini series. Better Call Saul On AMC has been pretty good so far.
  3. This was an interesting article on V-day celebrations in Japan
  4. New Card game that pushes kids to move their butt - is this the future of kids in this digital age?
  5. What ISIS really wants: A very detailed article on the beliefs, strategy and future plans of this group - and let me tell you it is some scary shit


Saturday, February 21, 2015

Roasted Ratatouille with Rice

This is one of my favorite dinner dishes. It requires a little bit of effort in chopping and dicing but that's about it. The best part of this recipe is that you can make it with whatever vegetables you have in your fridge.


INGREDIENTS
2-3 handfuls of cherry tomatoes
1 small eggplant - diced
1 zucchini - diced
1 squash - diced
2 small carrots - diced
1 red/yellow bell pepper - diced
1 medium yellow onion - diced
3 garlic cloves - crushed

6 tbsp olive oil
2 tbsp balsamic vinegar
salt & pepper
red pepper flakes
3 tbsp Fresh basil (about 10 leaves)- chopped
1tbsp fresh or dried oregano
1tbsp fresh thyme (optional)

Process:

  1. Pre-heat the oven to 400F. 
  2. Dice all the veggies together - I cut them to about 1 inch sized pieces. Put them in a big mixing bowl.
  3. Add about 3-4 tbsp olive oil+ balsamic vinegar+ garlic+ salt, pepper and red pepper flakes to the veggies and mix well. Then spread this mixture in one even layer on the baking tray. I use a lasagna tray to make such veggies - so I just mix all the spices directly in the tray (saves me from using an extra one dish)
  4. Chop the cherry tomatoes in half and put them in another pan and add 2 tbsp olive oil + little bit of salt and pepper.
  5. Put the veggies in the upper rack of the oven and the tomatoes in the lower rack and set the timer to 20 mins.
  6. After 20 mins, check your veggies - I like them a bit brown on the edges - so usually keep them for additional 5-7 mins. The tomatoes will be definitely done in 20 mins and would be bursting with juices.
  7. Once the veggies are done as well- mix the tomatoes in them and add the chopped/dried herbs - basil+oregano+thyme 
  8. Serve the veggies on a bed of rice or spaghetti . We usually eat them with rice.


Wednesday, February 18, 2015

Kale Salad with Poppy Seed Dressing


This is another one of those salads that I make regularly. Raw kale can be really chewy and hard to actually swallow - that is why this salad needs kale leaves to be massaged well in olive oil - the massaging makes them soft and less chewy.

INGREDIENTS:
  • 1 bunch kale leaves - de-stemmed and torn into smaller pieces
  • 1 lime juice
  • 1-2 tbsp Olive Oil
  • 1 tsp Sea Salt
  • 1-2 Avocado
  • 1/2 cup grapes
  • 1/4 cup pine nuts
Dressing:
  • 4 tbsp olive oil
  • 2 tbsp apple cider vinegar
  • 1 tsp Mustard sauce
  • 1tsp honey
  • 1tbsp poppy seeds
  • pinch of salt
NOTES:
  • You can use any kind of kale, I usually use lacinato/dinosaur kale
  • You can add any variety of veggies and grains to this salad. I have tried adding quinoa and moon dal sprouts. 
PROCESS:
  1. Massage the kale: Put the torn kale leaves in a big salad bowl and add the olive oil, lime juice and salt. (I would suggest starting with juice of half a lime and add more later in needed). Now, roll up your sleeves and massage the kale leaves with your palms - do it for about 3-4 minutes till the Kale turns deep green in color and soft in texture.
  2. Chop the avocado and grapes and add them to the salad bowl
  3. Toast the pine nuts on low flame till they are fragrant and turn slightly brown in color
  4. Mix all the dressing ingredients well in a bowl and drizzle it on the salad as much as you need. You can store the leftover dressing in the fridge for up to a week.
  5. Top it with toasted pine nuts and your salad is done.